Newsletters

Bird damage can reduce the value of a crop quickly. Cherries, berries, apples, and grapes are especially attractive when fruit begins to color. For commercial growers, orchard bird netting provides a direct way to protect marketable fruit while reducing dependence on scare devices and repeated field intervention.

The right solution depends on your crop, block size, bird pressure, support structure, and harvest plan. This guide covers the main decisions involved in selecting and installing orchard bird netting for commercial use.

Why Orchard Bird Netting Works

Bird netting creates a physical barrier between birds and the crop. When properly sized, supported, and sealed, it prevents birds from reaching fruit and entering the protected area.

Effective orchard bird netting should:

  • Cover the full crop area
  • Stay supported above the canopy where possible
  • Remain secure in wind
  • Close gaps along the perimeter
  • Allow access for workers and equipment
  • Be inspected throughout the growing season

A loose net with open edges can still allow birds to enter. Installation quality is just as important as the netting itself.

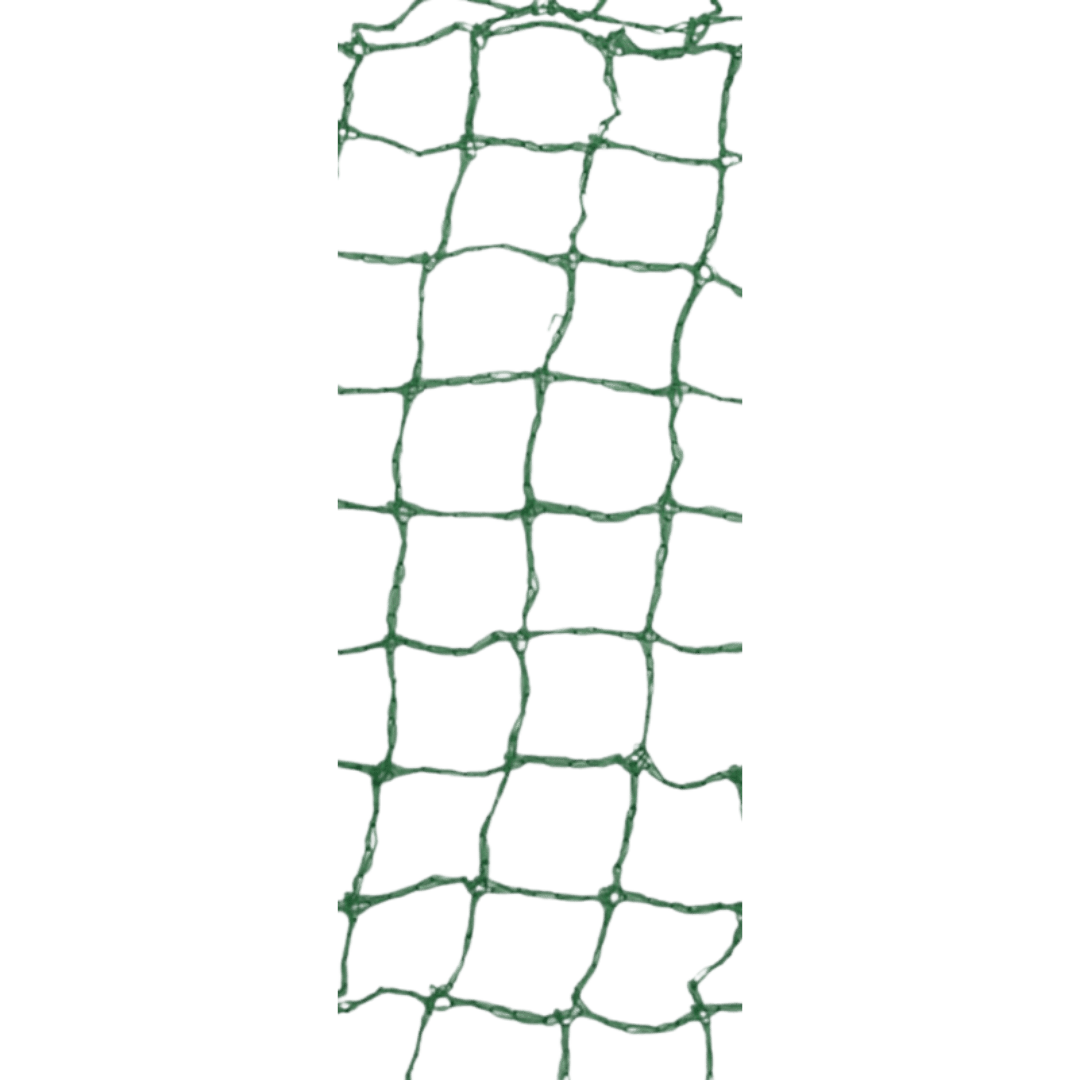
American Nettings & Fabric knitted bird netting is made from UV-stabilized HDPE and uses a flexible 3/4-inch square mesh. The netting cuts without unraveling and has a stated life expectancy of five or more years when used and stored properly.

Start With a Block Assessment

Before ordering netting, assess the block you want to protect. Measure more than the planted rows. Include the height and width of the mature canopy, the planned support structure, access points, and the amount needed for overlaps and anchoring.

Record:

  • Crop type and variety
  • Block length and width
  • Mature plant or tree height
  • Row spacing
  • Trellis or post locations
  • Machinery access points
  • Areas with high bird activity
  • Nearby roosting or nesting areas

Allow additional material for seams, side coverage, and ground-level attachment. A small amount of extra netting is useful when working around corners, posts, trunks, and uneven ground.

Where possible, keep netting above the canopy. This helps prevent birds from landing directly on the net and reaching fruit through the mesh. It also reduces contact between the net and branches, which can cause abrasion or snagging.

Choose the Right Orchard Bird Netting

Mesh size is one of the most important specifications. Choose the mesh based on the smallest bird you need to exclude, not only the largest bird you see.

Common options include:

  • 3/4-inch mesh: Suitable for many general orchard and garden applications
  • 5/8-inch mesh: A tighter option for larger-scale vineyard and multi-row applications
  • Smaller mesh: Better suited to situations with very small birds, subject to crop and pollination needs

American Nettings & Fabric offers several orchard bird netting formats. Standard knitted bird netting is available in sizes from smaller retail packages to commercial rolls, including 7.5-foot, 15-foot, and 30-foot widths with longer roll options.

For larger vineyard and orchard blocks, Vineyard Multi-Row & Drape Netting provides commercial-scale options:

  • Multi-Row Netting: 5/8-inch hexagon mesh, black, approximately 10-year life expectancy
  • Drape Netting: 3/4-inch diamond mesh, green, approximately 10-year life expectancy
  • Premium extruded netting: Available in long commercial rolls

The heavier multi-row product is designed for large applications that require additional structural support. Drape netting is intended to be draped rather than stretched tightly and is suited to large-scale bird control.

Match the System to the Crop

Berries

Blueberries, strawberries, raspberries, and other berries can attract heavy bird pressure because fruit is exposed and easy to reach.

For berry blocks:

  • Use a tunnel, cage, or overhead support system
  • Seal the bottom edge carefully
  • Keep netting away from the fruiting canopy when practical
  • Provide enough height for picking and field equipment
  • Install before birds begin heavy feeding

Ground-level gaps are a common weak point. Birds can move beneath loose edges, especially where plants are low. Secure the netting with staples, pins, soil, or a perimeter line.

Apples

Apple orchards often require a more substantial support system because trees are taller and blocks may be large.

Options include:

  • Permanent overhead canopy structures
  • Multi-row netting supported by posts and wires
  • Seasonal drape systems for smaller blocks
  • Individual tree protection for limited high-value areas

Keep enough clearance between the mature canopy and the netting. The exact spacing depends on the tree form and support design, but the net should not rest heavily on fruiting branches.

Cherries

Birds can cause significant losses in cherry blocks as fruit approaches harvest. Full-block protection is often preferred where bird pressure is consistent.

Install orchard bird netting before fruit reaches peak color. Check the entire perimeter after installation. Pay close attention to corners, row ends, equipment openings, and areas around posts.

The American Nettings & Fabric bird netting product page specifically identifies cherry trees, fruit cages, garden rows, and vineyards as suitable applications for its knitted green mesh.

Vineyards

Vineyards require a netting system that works with the trellis and harvest process. Side netting can protect the fruit zone, while multi-row or overhead systems can cover larger areas.

Plan for:

  • Trellis wire attachment
  • Bottom-edge closure
  • Row-end access
  • Mechanical or hand harvest
  • Seasonal removal or repositioning
  • Sufficient overlap between adjoining sections

Use removable or roll-up sections where workers and machinery need regular access. Netting must be closed after each entry to maintain effective exclusion.

Commercial vineyard multi-row netting for bird protection

Build a Reliable Support Structure

Commercial orchard bird netting performs best when the support system is planned before the netting arrives.

A typical overhead or multi-row structure may include:

  • Perimeter posts
  • Bracing at corners and ends
  • Taut perimeter wire
  • Cross wires or cables
  • Intermediate support points
  • Net-to-wire clips
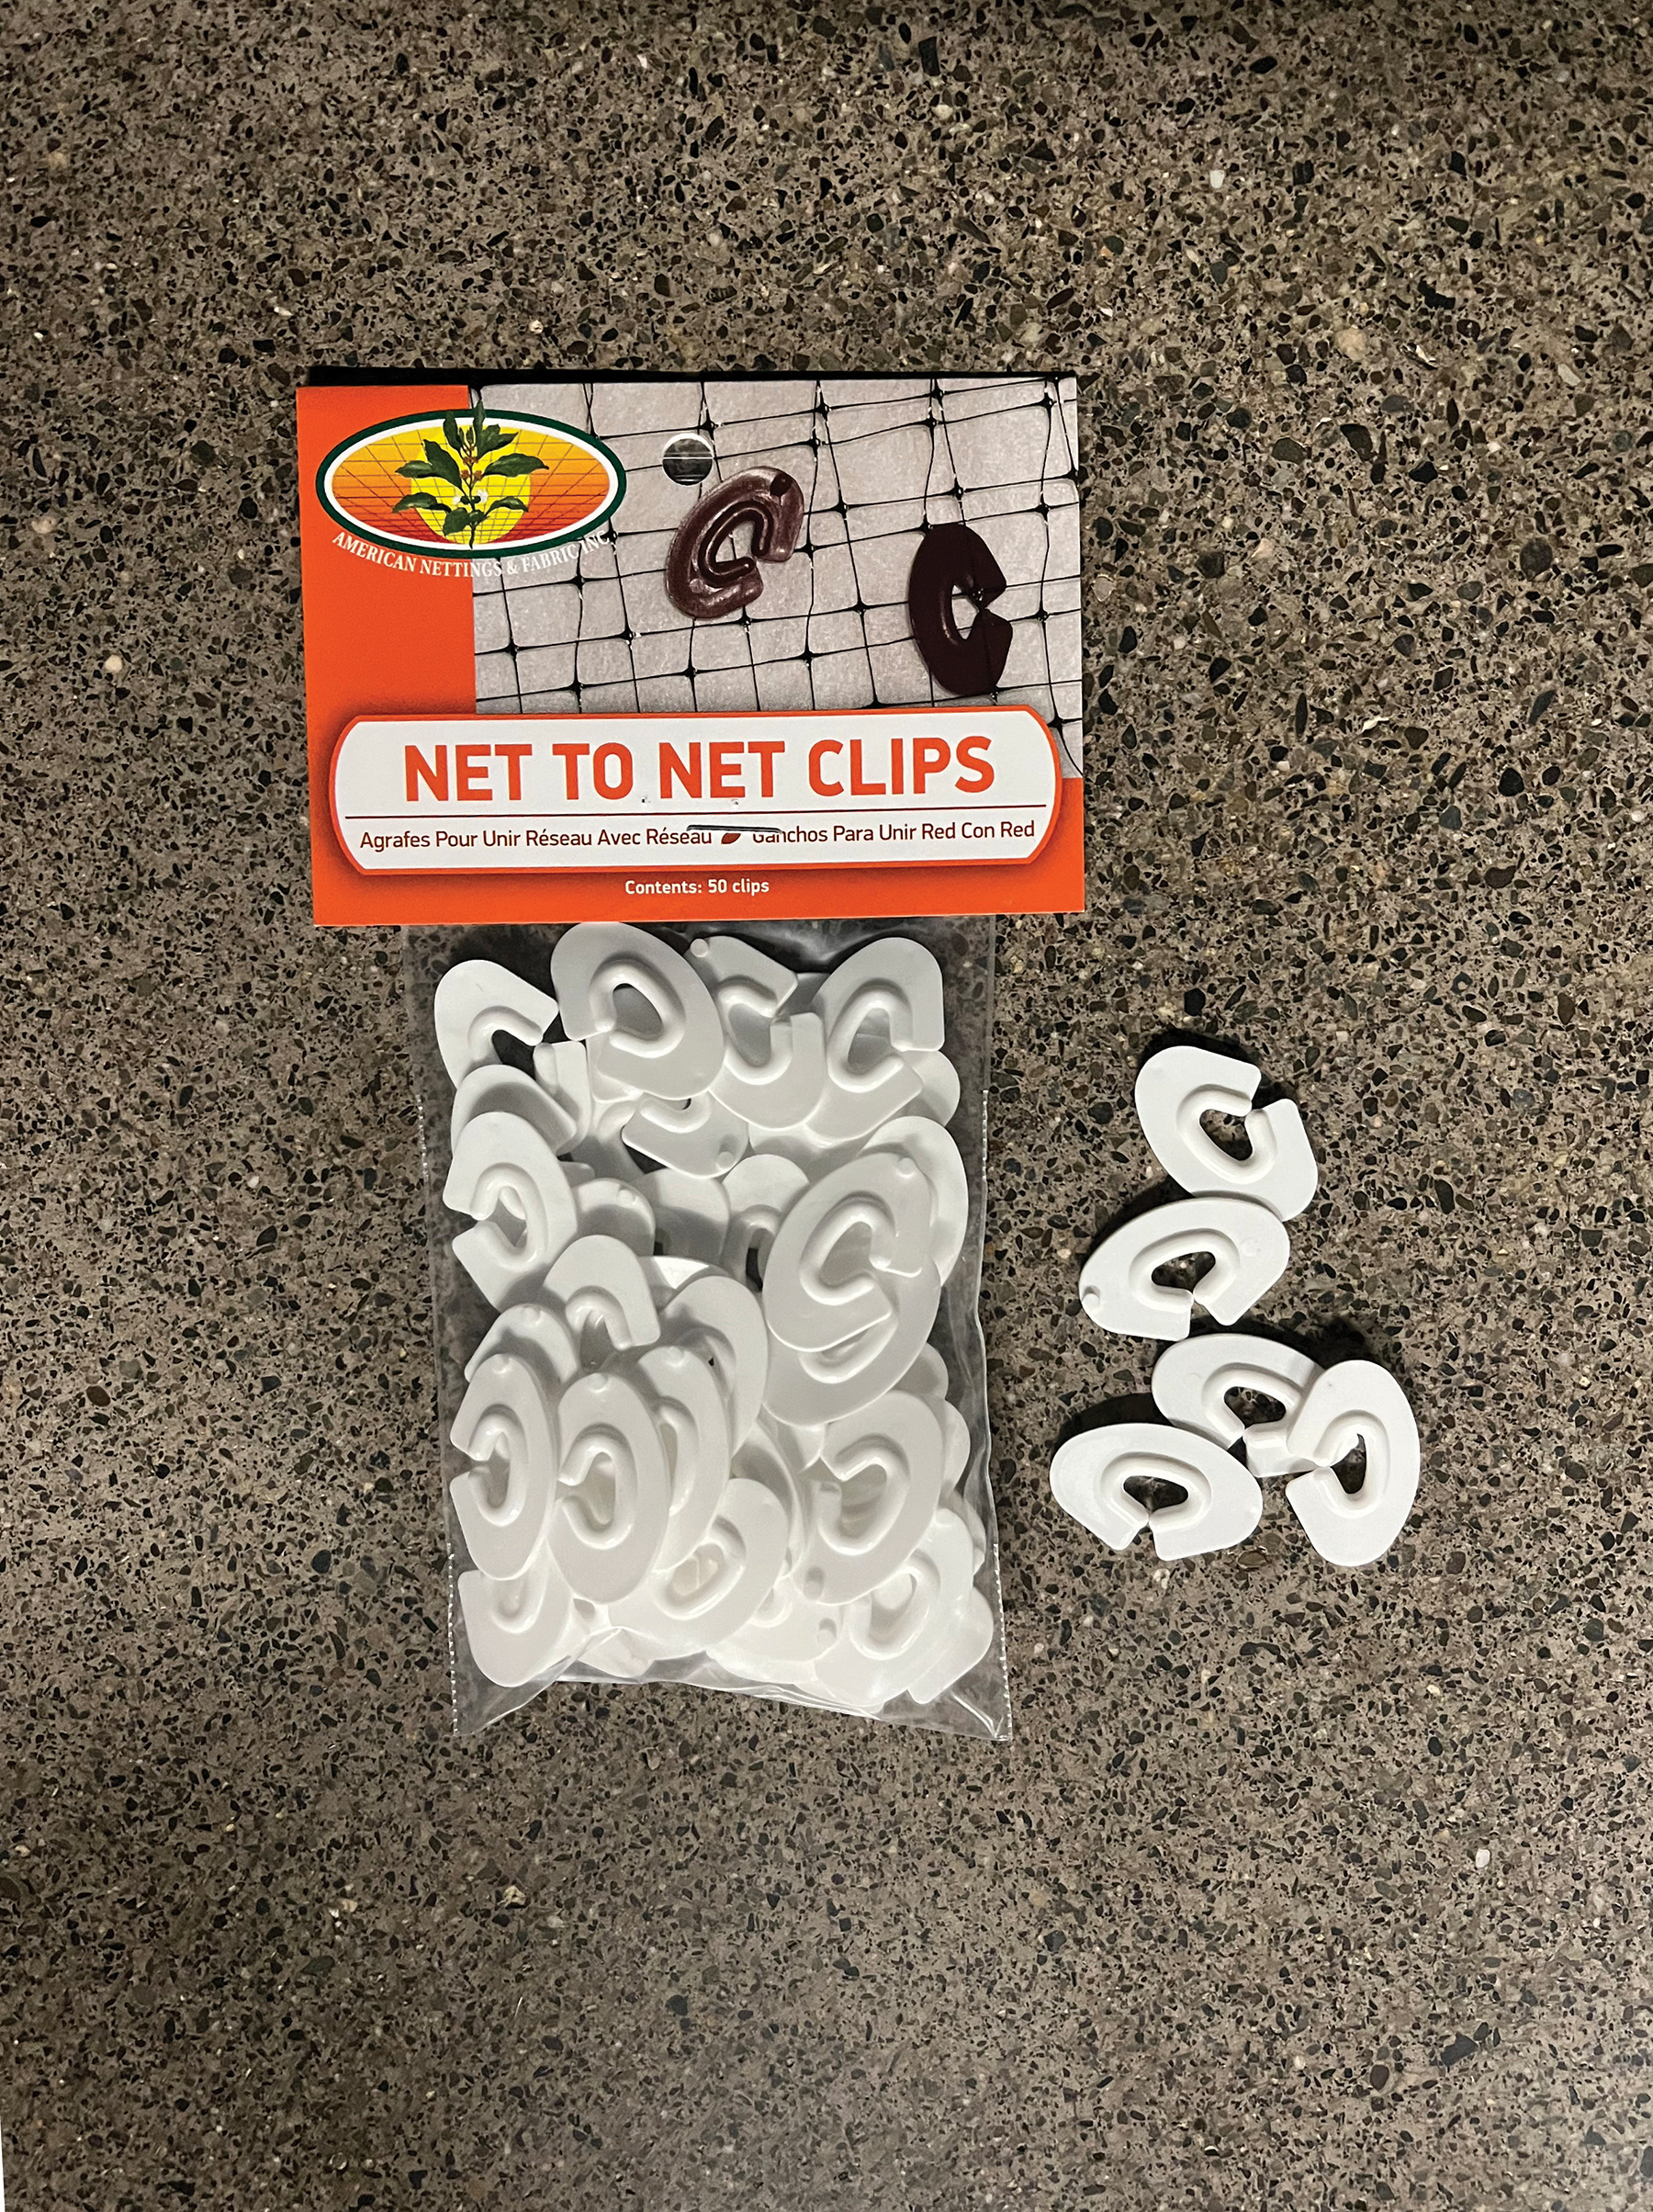
  • Net-to-net clips
  • Ground anchors or perimeter lines

Post spacing should reflect the netting type, span, site exposure, and expected wind or snow load. Long unsupported spans may sag or place excess force on the perimeter.

For vineyards and multi-row applications, netting clips provide practical attachment options. Net-to-wire clips connect netting to trellis wire or support wire. Net-to-net clips join adjoining pieces and help close seams.

Use the support structure to carry the netting. Avoid relying on fruiting branches, thin temporary stakes, or loose wire ends.

Install Orchard Bird Netting in Stages

A careful installation reduces damage and saves labor later.

1. Prepare the block

Remove sharp debris and identify branches, posts, or hardware that could snag the net. Prune or protect outlying growth that may create openings.

2. Install the support system

Set posts, brace corners, and run support wires before lifting the netting. Check that the structure is stable and that access points are clearly marked.

3. Position the netting

Unroll the netting carefully. For large sections, use poles, lifting tools, or multiple workers to pull it over the support system. Do not drag it across sharp surfaces.

4. Secure the perimeter

Attach the netting to support wire with clips or suitable fasteners. Secure the bottom edge with stakes, staples, soil, or a perimeter line.

5. Close seams and access points

Overlap adjoining sections and fasten the seam. Close gaps around posts, trunks, corners, gates, and row ends. An open access flap can become a regular entry point for birds.

6. Inspect the completed installation

Walk the full perimeter. Look for openings, loose edges, sagging sections, torn mesh, and areas where birds could enter.

Netting clips for securing orchard bird netting to wire

Protect Wildlife Through Proper Use

Netting should exclude birds without creating unnecessary entanglement risks. The University of California Agriculture and Natural Resources notes that netting should be installed tightly and securely, with particular attention to small openings, bottom edges, and regular inspection. See the UC ANR guidance on bird netting for additional wildlife-safety information.

Good field practices include:

  • Install netting after flowering and pollination where appropriate
  • Keep flexible netting tight and off the canopy
  • Seal the bottom edge and areas around trunks
  • Avoid loose pockets and unsupported sagging
  • Inspect regularly during periods of high bird activity
  • Repair tears promptly
  • Remove or store seasonal netting after harvest when practical

Always follow local wildlife regulations and your operation’s safety procedures.

Plan for Labor, Access, and Storage

The best orchard bird netting system is one your team can manage consistently. Before installation, decide who will open and close access points, inspect the perimeter, complete repairs, and remove the netting after harvest.

For seasonal netting:

  • Store it clean and dry
  • Keep it away from rodents and sharp equipment
  • Avoid unnecessary folding that creates permanent damage
  • Label sections by block or row
  • Record repairs before the next season

For large commercial orders, material width, roll length, freight, and handling should be reviewed in advance. Larger rolls may require pallet delivery or direct order coordination.

Get Help Selecting Orchard Bird Netting

Every orchard has different requirements. Crop height, row layout, bird species, wind exposure, harvest equipment, and the expected number of seasons all affect the right choice.

American Nettings & Fabric has more than 40 years of experience supplying nettings and fabrics for commercial growers, vineyards, orchards, nurseries, and home applications. Our team can help compare mesh types, roll sizes, clips, support lines, and installation approaches.

Explore orchard and crop protection netting or contact American Nettings & Fabric for product guidance and commercial-scale requirements.

Protect your crop. Plan your netting system. Contact our team for practical help.

Bird netting fabric is a practical way to protect fruit trees, berry plants, vineyards, and vegetable gardens from birds. Instead of using chemicals or scare devices, bird netting creates a physical barrier between wildlife and the crops you are growing.

The right bird netting fabric allows sunlight, air, and rain to reach your plants while helping keep birds from reaching ripe fruit. It can be used in home gardens, small orchards, commercial growing operations, and vineyard rows.

American Nettings & Fabric, Inc. supplies American-made netting and fabric products for growers, gardeners, landscapers, and agricultural operations across North America.

What Is Bird Netting Fabric?

Bird netting fabric is a lightweight mesh made to exclude birds from a protected area. The material is commonly manufactured from UV-stabilized plastic such as high-density polyethylene, or HDPE. Some products are also made from polypropylene.

The mesh openings are large enough to allow light and airflow through, but small enough to prevent target birds from reaching the plants. Bird netting fabric may be:

  • Draped directly over a plant or tree
  • Installed over a support frame
  • Fastened to posts and wire
  • Used as a garden cage cover
  • Installed over vineyard rows
  • Secured around berry plants and garden beds

Knitted bird netting is flexible and easy to handle. It can be cut to size for many applications and stored for later use. American Nettings & Fabric’s Knitted Bird Netting is made with Rachel-Knit HDPE, green in color, UV stabilized, and designed with a 3/4-inch square mesh.

Close-up of ripe cherries protected by green bird netting fabric

How Bird Netting Protects Fruit Trees

Birds often begin feeding on fruit before it is fully ripe. Cherries, blueberries, grapes, peaches, plums, nectarines, figs, and other fruit can attract birds as soon as the color and sugar content begin to change.

Bird netting fabric protects trees by blocking access to the fruit. When the net is installed correctly, birds cannot fly through the mesh or reach fruit from the outside.

The netting does not need to touch the fruit or branches. In fact, using poles, posts, or another support system to keep the net above the canopy can make installation safer and more effective.

For a fruit tree, the basic process is:

  1. Measure the full width and height of the tree canopy.
  2. Choose netting large enough to cover the entire crown.
  3. Support the net above the branches where possible.
  4. Drape the net over the tree.
  5. Close gaps around the trunk and lower edges.
  6. Secure the material with clips, ties, or other fasteners.

The goal is full coverage. Even a small opening can allow birds to enter and remain inside the protected area.

Choosing the Right Mesh Size

Mesh size refers to the distance across each opening in the netting. Choosing the right size depends on the bird species causing damage and the level of protection you need.

1/2-Inch Mesh

A 1/2-inch mesh is often selected when very small birds are a concern. It provides a tighter barrier and may be suitable for gardens with persistent activity from small songbirds.

Smaller mesh can offer broader exclusion, but it may also be less convenient to handle over large trees or commercial areas. Always consider the size of the crop area and the birds you need to deter.

3/4-Inch Mesh

A 3/4-inch mesh is a common all-purpose choice for fruit trees, berry plants, vineyards, and vegetable gardens. It is designed to block many common garden and orchard birds while remaining lightweight and flexible.

American Nettings & Fabric’s standard Knitted Bird Netting uses a 3/4-inch square mesh. It is available in sizes ranging from smaller garden pieces to commercial rolls.

1-Inch to 1 1/8-Inch Mesh

Larger mesh sizes may be used when the main concern is larger birds. They can provide more open airflow and may be practical for some orchard or structural applications.

However, larger mesh may allow smaller birds to pass through. If sparrows, finches, or other small birds are feeding on your crops, a tighter mesh is generally a better starting point.

5/8-Inch Hexagon Mesh

Commercial vineyard applications may use specialized mesh designs. For example, American Nettings & Fabric offers Multi-Row Netting with a 5/8-inch hexagon mesh. This heavier option is intended for large-scale applications that require added structure and durability.

When selecting mesh, match the opening to the birds you need to exclude. If you are unsure, contact a netting specialist before ordering. The right size can help reduce crop loss and avoid unnecessary replacement work.

Bird Netting Fabric for Different Growing Applications

Bird netting fabric can be adapted to many crop protection needs.

Fruit Trees

Use bird netting fabric as a temporary canopy guard during the ripening period. The net should cover the entire canopy and be secured so birds cannot enter through openings around the trunk or lower branches.

For larger trees, two people can make installation easier. Long poles can help lift the net over the top of the canopy without pulling heavily on branches.

Berry Plants

Berry plants are often easy for birds to reach because the fruit grows close to the outside of the plant. Netting can be draped over the plants and secured around the edges.

For ground-level crops, cover the bottom edge with soil or secure it with Fabric Staples & Pins. This helps prevent wind from lifting the material and keeps birds from moving underneath it.

Bird netting fabric used over a garden enclosure

Vineyards

Vineyard netting can be installed over individual rows, multiple rows, or larger sections of a growing operation. Multi-row and drape netting are available for commercial vineyard layouts.

Drape Netting is designed for large-scale bird control and uses a 3/4-inch diamond mesh. Multi-row netting uses a heavier 5/8-inch hexagon mesh for applications that need additional strength.

Vegetable Gardens

Birds may damage seedlings, leafy vegetables, tomatoes, and ripening crops. Bird netting fabric can be installed over a simple frame or garden cage to create a reusable protective structure.

For garden beds, leave enough room between the netting and the plants. This helps prevent growing stems from pushing into the mesh and makes harvesting easier.

How to Install Bird Netting Safely

Correct installation is important for both crop protection and wildlife safety.

Support the Net Above the Plants

A frame, poles, hoops, or perimeter wire can help keep the net off the foliage. This reduces sagging and makes the barrier easier for birds to see.

Keep the Material Taut

Loose folds and gaps can reduce performance. Pull the netting moderately taut and secure it at regular intervals. Do not stretch it so tightly that the material or support structure is damaged.

Close Gaps Completely

Inspect the base, corners, trunk area, and connection points. Birds can enter through surprisingly small openings. Use Netting Clips to join sections or fasten netting to wire.

Net-to-net clips can connect pieces of netting. Net-to-wire clips can secure netting to a support wire while allowing a stronger, cleaner installation.

Check the Net Regularly

Inspect bird netting fabric throughout the growing season. Look for:

  • Tears or loose sections
  • Openings around the trunk
  • Sagging areas
  • Branches pressing against the mesh
  • Wildlife caught in or near the netting

Repair damage promptly. Remove the net after harvest or when protection is no longer needed.

Why Choose American-Made Bird Netting Fabric?

Netting is exposed to sunlight, wind, rain, plant growth, and repeated handling. Product quality matters when the material needs to perform through an entire growing season or be reused year after year.

American Nettings & Fabric has more than 40 years of family-owned experience supplying nettings and fabrics for agriculture, gardening, landscaping, and home applications. Our American-made quality products are available in sizes ranging from retail packages to commercial rolls.

Whether you are protecting one backyard cherry tree or several vineyard rows, the right netting solution can simplify crop protection. Our team can help you compare mesh sizes, dimensions, fasteners, and installation methods for your application.

Protect Your Crops With the Right Netting

Bird netting fabric provides a simple, reusable barrier for fruit trees and crops. Start by identifying the birds causing damage, then choose a suitable mesh size and enough material to cover the full growing area.

For many home gardens and fruit trees, 3/4-inch knitted bird netting is a practical option. Commercial growers may need heavier vineyard netting, multi-row coverage, or custom-sized rolls.

Shop Knitted Bird Netting or contact American Nettings & Fabric for help selecting a suitable crop protection solution.

Birds play an important role in the environment, but they can also cause serious damage when fruit, berries, vegetables, or seeds begin to ripen. A few feeding birds can quickly become a flock, leaving damaged produce and reducing the quality of your harvest.

Bird netting for crops creates a physical barrier between birds and the plants you work hard to grow. With the right mesh, support system, and installation method, netting can protect small garden plots, berry rows, fruit trees, vineyards, and larger agricultural areas.

Why Use Bird Netting for Crops?

Bird netting helps protect crops without applying sprays or placing traps around the growing area. It can be installed when crops become vulnerable and removed after harvest.

Bird netting is commonly used for:

  • Strawberries, blueberries, raspberries, and currants
  • Cherries, peaches, plums, nectarines, and figs
  • Grapes and vineyard rows
  • Vegetable gardens and field crops
  • Seed-producing plants
  • Chicken enclosures and garden cages
  • Small ponds and water features

American Nettings & Fabric’s Knitted Bird Netting is made from UV-stabilized Rachel-Knit HDPE. It has a green, flexible 3/4-inch square mesh and is designed for repeated use. Available sizes range from small retail packages to large rolls for commercial applications.

Bird netting draped over berries and ground produce

Choose the Right Bird Netting

Start by identifying the birds causing damage and measuring the area that needs protection. The netting should cover the complete crop area with enough extra material to reach the ground or perimeter supports.

Consider these points before ordering:

Mesh size

Mesh size determines which birds the netting can exclude. A 3/4-inch mesh is suitable for many common orchard and garden applications, including protection from larger fruit-eating birds.

If smaller birds such as sparrows are feeding on your crops, a smaller mesh opening may be more appropriate. Review the mesh size carefully and contact a netting specialist if you need help matching the product to your bird pressure and crop.

Netting strength

Choose netting designed for outdoor agricultural use. UV stabilization helps the material withstand sunlight over time. Knitted netting also offers flexibility for draping over plants, bushes, and tree canopies.

Coverage and size

Measure:

  • The length and width of the crop area
  • The height of the tallest plants
  • The distance between support posts
  • The perimeter where the netting will be anchored
  • Any space needed for doors, access flaps, or equipment

Avoid cutting the netting too close to the crop. Extra material makes it easier to secure edges and close gaps.

How to Install Bird Netting Over Field Crops

Field crops and vegetable plots usually need a simple frame or overhead support system. The goal is to keep the netting above the plants and close every opening around the perimeter.

1. Prepare the crop area

Remove branches, tall weeds, and other objects that could snag the netting. Check the plants for ripe produce and plan where you will enter the covered area for watering, weeding, and harvest.

2. Install perimeter supports

For smaller plots, use PVC hoops, metal rods, wood stakes, or garden posts. Larger areas may require posts with wire or line running along the top.

The support system should hold the bird netting above the crop. Avoid allowing the net to rest directly on foliage whenever possible. Birds can push against netting that touches fruit or leaves, and wind movement may cause unnecessary rubbing.

3. Drape the netting over the frame

Unroll the netting on a calm day. Center it over the structure so there is enough material on every side.

Pull the netting into position without overstretching it. Leave enough clearance for plant growth and for the net to remain above the crop during wind and rain.

4. Secure every edge

Anchor the bottom edge with Fabric Staples & Pins, soil, boards, rocks, or other suitable weights. The edge must stay close to the ground so birds cannot walk or fly underneath.

If you need to join two pieces, overlap the sections and secure the seam with Netting Clips, ties, or lacing. Pay close attention to corners and ends. Small gaps in these areas can give birds access to the entire crop.

Bird netting used as a garden enclosure

How to Protect Berries With Bird Netting

Berries are especially attractive to birds because they ripen in exposed clusters. Protection should cover the fruit zone completely.

Low-growing berries

For strawberries and other low crops, bird netting can be draped over a low hoop frame. In some situations, it may be placed over the plants and secured around the edges.

A frame is often the better option. It keeps the netting away from flowers and fruit, reduces plant contact, and makes picking easier.

Berry bushes

For blueberries, raspberries, currants, and similar bushes, install tall stakes or hoops around the plants. Drape the netting over the structure and pull it down around the base.

Secure the bottom edge with staples, soil, or weights. Do not leave openings where the net meets the ground or where two panels connect.

For a row of berry bushes, a continuous tunnel or cage is usually easier to manage than separate netting covers over every plant. Include a removable side section or liftable flap so you can harvest without removing the entire installation.

When to install berry netting

Apply bird netting after flowering and pollination when the fruit begins to develop. This allows pollinators to reach the flowers while they are open.

Install the netting before the berries begin to color and ripen. Remove it after harvest unless the same area needs protection for another crop.

How to Use Bird Netting on Fruit Trees

Individual fruit trees can be protected with a canopy-style installation. Larger orchards need a structured overhead system.

Small trees and home orchards

For a small tree, prepare a piece of netting large enough to cover the full canopy. Two long poles can help lift and position the netting over the top of the tree.

Once the canopy is covered:

  1. Pull the netting down around the sides.
  2. Check for exposed fruit along the edges.
  3. Secure the netting around the trunk or lower perimeter.
  4. Close gaps where branches meet the netting.
  5. Leave enough room for natural branch movement.

A support frame or outer cage can help keep netting off the fruit. Avoid pulling the material so tightly that it strains the branches or netting.

Bird netting positioned over a fruit tree canopy

Commercial orchards

Commercial orchards often use posts, wire, and overhead support lines to protect multiple trees or complete orchard blocks. This approach keeps the netting above the tree tops and provides more consistent coverage.

Plan access points before installation. Workers may need to enter for pruning, irrigation, equipment movement, and harvest. Removable panels, curtain sections, or dedicated openings can make seasonal work more efficient.

For larger fruit operations, review Vineyard Multi-Row & Drape Netting for options designed for large-scale bird protection. Custom orders and larger rolls are also available by contacting American Nettings & Fabric.

Bird Netting for Vineyards

Grapes can attract birds as soon as they begin to ripen. Vineyard netting may be installed over individual rows, multiple rows, or the full crop area.

American Nettings & Fabric offers several vineyard netting options:

  • Multi-Row Netting: 5/8-inch hexagon mesh, black, designed for large-scale applications
  • Drape Netting: 3/4-inch diamond mesh, green, designed to be draped over vineyard structures
  • Premium Extruded Netting: Available in long commercial rolls for larger installations

Use Net to Wire Clips to attach netting to trellis wire or other support structures. Secure the sides and bottom edges so birds cannot enter between rows or underneath the netting.

Bird netting installed over vineyard rows

Inspect Bird Netting Throughout the Season

Bird netting works best when it remains fully secured and in good condition. Inspect the installation regularly, especially after strong wind or heavy rain.

Check for:

  • Tears or holes
  • Loose clips and ties
  • Sagging sections
  • Gaps along the ground
  • Open seams between panels
  • Netting touching fruit or foliage
  • Wildlife that may have entered the enclosure

Repair small openings promptly. If the material becomes brittle, badly damaged, or difficult to secure, replace it before the next growing season.

Use firm, well-fitted netting and avoid loose, stretchy materials with large openings that may create wildlife hazards. If an animal becomes caught, follow local wildlife guidance or contact a qualified wildlife professional.

Store Netting for Future Use

At the end of the season, remove the netting carefully. Clear away leaves, stems, and other debris. Check for damage before storage.

Allow the material to dry completely, then fold or roll it and keep it in a clean, dry location away from direct sunlight and rodents. Proper storage helps extend its usable life and makes installation easier next season.

Find the Right Crop Protection Solution

Bird netting for crops can protect valuable produce with a practical, reusable barrier. The best results come from choosing suitable mesh, supporting the net above the plants, sealing every edge, and checking the installation throughout the season.

Explore Knitted Bird Netting for garden, orchard, vineyard, and field applications. For large-scale requirements, visit the Crop Protection collection or contact American Nettings & Fabric for product guidance.

Protect Plants With a Reusable Garden Barrier

A green garden net can help protect fruit, vegetables, flowers, and young plants without relying on frequent chemical sprays. The right netting creates a physical barrier against birds, deer, and other garden pests while allowing air and water to reach your plants.

Green netting also blends into many garden, orchard, and vineyard settings. It provides practical protection without making the growing area feel closed off.

At American Nettings & Fabric, we supply netting and fabric solutions for home gardens, commercial farms, orchards, vineyards, nurseries, and landscaping projects. Products are available in sizes ranging from retail packages to large commercial rolls.

What Is Green Garden Netting?

Green garden netting is a flexible mesh material used to protect plants and crops. Depending on the product, it may be used to:

  • Keep birds away from ripening fruit
  • Protect vegetable gardens from wildlife
  • Cover garden rows and fruit cages
  • Support climbing plants
  • Reduce sun exposure and wind
  • Create barriers around poultry or garden areas
  • Protect shrubs and small trees during winter

The color is mainly a matter of appearance. The most important factors are the mesh opening, material, size, strength, and installation method.

For example, American Nettings & Fabric’s Knitted Bird Netting uses a green, 3/4-inch square mesh. It is made from UV-stabilized HDPE and is designed for repeated use, storage, and seasonal installation.

Green knitted bird netting used to protect garden plants and fruit

Choose the Right Mesh for the Problem

The best green garden net depends on what you need to keep out or support.

Bird Protection

Bird netting is a practical option for:

  • Strawberries
  • Blueberries
  • Cherries
  • Grapes
  • Peaches
  • Plums
  • Figs
  • Vegetable gardens
  • Fruit cages
  • Garden rows

A 3/4-inch mesh can help stop many birds from reaching fruit and vegetables. It is lightweight and flexible, so it can be draped over plants, trees, cages, and simple support structures.

For ground crops, place the net over the plants and secure the edges with soil, staples, pins, or other suitable fasteners. Securing the edges helps prevent wind from lifting the net and stops animals from moving underneath it.

Deer and Larger Wildlife

Bird netting may not be the best choice when deer are the main concern. For gardens, berry plants, and larger areas, consider a dedicated Deer & Bird Netting product or a heavier deer fencing solution.

Deer and bird netting is a lightweight polypropylene mesh with a 3/4-inch square opening. It can be installed around a garden with posts and top support wire. Netting clips or lacing can be used to fasten the material to the structure.

For larger deer pressure or long-term installations, Heavy Duty Deer Fence may be a better fit.

Insect Protection

Bird netting will not stop small insects. If your main concern is insects, use a finer product designed for that application.

American Nettings & Fabric offers crop protection products such as:

Fine mesh can protect sensitive crops from certain flying pests. However, smaller openings may reduce airflow or make installation more demanding. Choose the finest mesh needed for the pest you are trying to exclude.

Use Green Garden Netting for Fruit Trees and Vineyards

Green garden netting is especially useful as fruit begins to ripen. Birds often damage crops close to harvest, when fruit is most attractive. Installing netting before this stage can help reduce losses.

For a small fruit tree:

  1. Measure the tree and allow extra material for coverage.
  2. Tie two long poles to opposite corners of the netting.
  3. Lift the net over the tree with help from another person.
  4. Check that the net reaches around the canopy.
  5. Secure the netting near the trunk and close open gaps.
  6. Inspect the installation regularly for loose areas or damage.

For vineyards and commercial orchards, larger netting systems may be more suitable. The Vineyard Multi-Row & Drape Netting collection includes options for large-scale bird control and vine support.

Green Drape Netting uses a 3/4-inch diamond mesh and is designed to be draped rather than stretched tightly. It is made with UV-stabilized HDPE and has a listed life expectancy of up to 10 years. Larger commercial rolls are available by contacting the American Nettings & Fabric team.

Green garden netting covering vineyard rows for crop protection

Protect Plants Without Blocking Their Growth

Netting works best when it creates space between the mesh and the plant. If the material rests directly on leaves, birds or insects may still reach the crop through the net. Contact with foliage can also make it harder to inspect, water, prune, and harvest.

Use hoops, posts, trellis wire, poles, or a simple garden frame to support the netting above the plants.

A good installation should provide:

  • Enough height for plant growth
  • Clear access for watering and harvesting
  • Secure edges
  • Proper tension
  • Strong support in windy areas
  • No large openings around the base or corners

For a reusable system, Netting Clips make it easier to attach, join, remove, and reposition netting. Net-to-net clips can join pieces of netting. Net-to-wire clips can connect netting to support wire. Curtain clips are useful when the net needs to slide open regularly.

Netting clips used to secure garden netting to wire and adjoining mesh

Consider Shade and Heat Protection

Not every garden problem is caused by animals. Excessive sun, heat, and wind can also affect plant health.

For areas that need both plant protection and shade, Privacy Shade Cloth is another option. The green shade cloth is UV stabilized, cuts with scissors without unraveling, and blocks approximately 70% of the sun’s light.

It can be used for:

  • Greenhouse coverage
  • Vegetable gardens
  • Windbreaks
  • Outdoor growing areas
  • Pet shade
  • Temporary seasonal structures

Shade cloth is not a substitute for bird or insect netting. Instead, it addresses a different growing challenge. Select it when reducing light and heat is a priority.

Green privacy shade cloth used to protect plants in a garden or greenhouse

Measure Before You Buy

Accurate measurements help reduce waste and simplify installation.

Before selecting a green garden net, measure:

  • The length and width of the growing area
  • The height of mature plants
  • The width of support hoops or posts
  • The distance around trees or shrubs
  • Extra material needed for securing edges
  • Openings that need to be covered or accessed

American Nettings & Fabric’s knitted bird netting is available in several sizes, including:

  • 7.5 feet × 21 feet
  • 7.5 feet × 100 feet
  • 15 feet × 15 feet
  • 15 feet × 100 feet
  • 30 feet × 30 feet
  • 30 feet × 100 feet
  • Commercial rolls up to 500 feet long

Larger agricultural operations can also request custom guidance and commercial sizing. A properly sized roll can save installation time and reduce the need to join multiple pieces.

Make Your Netting Last Longer

Reusable netting is a more practical choice when it can be used season after season. Proper care helps preserve the material and reduces unnecessary replacement.

Follow these basic steps:

  • Install netting without sharp bends or excessive pulling.
  • Use suitable clips, pins, or staples.
  • Inspect the mesh during the growing season.
  • Repair small tears before they spread.
  • Remove netting carefully after harvest.
  • Shake off leaves and soil.
  • Clean it when needed.
  • Dry it fully before storage.
  • Store it away from direct sunlight and rodents.

Knitted Bird Netting is designed to be cut without unraveling, which can make it easier to adapt to garden beds, trees, cages, and other layouts.

Find the Best Green Garden Net for Your Application

The right green garden net should match your crop, pest, structure, and available space.

For fruit trees and berry plants

Choose lightweight green bird netting. Secure the net around the canopy and trunk to prevent gaps.

For raised beds and vegetable gardens

Consider bird netting, insect screen, or crop cover based on the pests present. Use hoops or a simple frame to keep the material above the plants.

For vineyards and orchards

Look for wider rolls, multi-row systems, or drape netting. Commercial applications may require clips, wire, line, and professional sizing support.

For deer protection

Choose deer fencing or deer and bird netting. Use a strong perimeter structure and secure the bottom edge.

For heat and sun protection

Select shade cloth rather than pest netting. Choose the coverage level based on the needs of your plants and growing area.

SHOP GARDEN NETTING AND FABRICS

American Nettings & Fabric has supplied American-made netting and fabric solutions for more than 40 years. From small garden packages to commercial rolls, the product range supports home gardeners, growers, landscapers, nurseries, orchards, and vineyards.

Explore Crop Protection Products

Shop Knitted Bird Netting

Contact the American Nettings & Fabric Team

Use the right mesh. Measure carefully. Install securely. Reuse whenever possible.

Deer can quickly damage shrubs, young trees, berry plants, and other garden favorites. Tender leaves, buds, flowers, and new growth are all attractive food sources, especially when natural forage is limited.

For many gardens, deer netting for shrubs offers a practical way to protect plants without building a full perimeter fence. A properly installed netting cage creates a clear barrier around the plant while allowing sunlight, air, and rain to reach the foliage.

The key is careful installation. Deer netting works best when it is supported, kept taut, and secured along the ground.

Why Use Deer Netting for Shrubs?

Shrubs and young trees are often too valuable or too widely spaced to justify a large fence system. Protecting each plant individually can be a simpler option.

Deer netting can help you:

  • Protect shrubs from repeated browsing
  • Shield young trees while they become established
  • Cover berry bushes and small fruit plants
  • Reduce damage to buds, flowers, and new growth
  • Create a lightweight barrier around individual plants
  • Remove or adjust the protection as plants grow

American Nettings & Fabric’s Deer & Bird Netting is made from black, UV-stabilized polypropylene with a 3/4-inch square mesh. The product is lightweight and designed as an alternative to heavier deer barriers.

The listed size is 7 feet by 100 feet, making it suitable for individual shrub cages, small garden sections, and other plant protection projects.

Deer and bird netting used around plants and garden areas

Choose the Right Protection for Your Plant

The best setup depends on the size of the plant, the level of deer activity, and the season.

Individual shrub cage

An individual cage is useful for:

  • Ornamental shrubs
  • Small fruit bushes
  • Recently planted landscape plants
  • Young trees with compact canopies
  • High-value plants in open gardens

A cage should extend above the normal browsing height and leave space between the netting and the foliage. If the net is placed directly against the shrub, deer may still reach leaves through the mesh.

Garden or planting-area enclosure

For several shrubs or a larger bed, install posts around the area and run netting between them. The American Nettings product guidance recommends post spacing of no more than 12 feet for a garden area. A taut wire or poly line along the top can provide additional support.

For larger projects, consider Deer & Poultry Fencing or Heavy Duty Deer Fencing. These options may be better suited to livestock areas, orchards, nurseries, and properties that need a more permanent barrier.

Seasonal shrub wrap

Deer netting for shrubs is not the same as winter shrub wrap.

Shrub Wrap is designed to wrap individual shrubs and small trees during winter. It helps reduce branch breakage from snow and can provide protection from deer, ice, salt, and transportation damage.

Use a supported deer netting cage when the primary goal is to keep deer away from the plant. Use shrub wrap when the main concern is winter handling and weather protection.

How to Install Deer Netting Around a Shrub

A strong installation does not need to be complicated. Follow these steps for a single shrub or young tree.

1. Measure the plant and plan the cage

Measure the height and width of the shrub. Plan for enough room between the foliage and the netting to prevent deer from reaching through.

As a practical guide, allow at least 12 to 18 inches of space beyond the widest branches. Larger shrubs may need more room. Leave additional space if the plant is actively growing.

The cage should also be taller than the deer’s likely browsing reach. A low cover placed close to the foliage may not provide enough protection.

2. Clear the ground

Remove sticks, sharp debris, weeds, and rocks from the area where the bottom edge will sit.

A clean ground line makes it easier to anchor the netting. It also reduces the chance of tearing the material during installation.

3. Set sturdy supports

Place three or four stakes around a small shrub. Use a square, rectangle, or circular layout based on the plant’s shape.

Set the supports firmly enough to resist wind and light pressure. Larger shrubs and young trees may need additional stakes. Use stronger corner or main posts when building a larger enclosure.

The supports should hold the netting away from the foliage. Avoid allowing the cage to lean into the plant.

4. Wrap the netting around the supports

Unroll the netting carefully and keep it aligned as you work. Wrap it around the stakes to form a continuous barrier.

Pull the material moderately taut. It should not sag into the plant, but avoid excessive tension that could damage the mesh or pull the supports out of the ground.

Overlap the ends where they meet. There should be no open vertical gap that a deer can push through.

5. Secure the sides and overlap

Attach the netting to the supports from top to bottom. Use ties, clips, or other suitable fasteners at regular intervals.

Netting Clips provide options for joining netting to itself or securing netting to wire. Net-to-net clips are useful where two sections meet. Net-to-wire clips are useful when the cage uses a support wire or poly line.

Secure the overlap closely enough that the two edges remain together in wind. Check the full height of the seam before finishing the installation.

Netting clips for joining and securing garden netting

6. Anchor the bottom edge

The bottom edge is one of the most important parts of deer netting installation.

A loose edge gives deer an opportunity to push underneath the barrier. Hold the netting tightly against the soil with landscape staples, pins, soil, or suitable weights.

American Nettings’ Fabric Staples are 6 inches long and made from 11-gauge steel. They are designed for securing fabrics and netting to the ground.

Place staples along the full perimeter. Use closer spacing in loose soil, windy locations, or areas where deer pressure is high.

Metal fabric staples used to secure netting to the ground

7. Check the top and openings

For low shrubs, a secure side enclosure may be enough if the netting extends above the browsing height.

For taller shrubs and young trees, inspect the top carefully. Deer may reach over a low cage or browse through an opening. Add a top section or bring the netting together above the plant when needed.

Do not leave loose loops or excess material that could catch on branches or create a wildlife hazard. Keep the netting neat, supported, and firmly attached.

Protecting Young Trees

Young trees need protection from both browsing and physical damage.

A deer netting cage can protect leaves, buds, and low branches. The cage should be wide enough to allow the canopy to develop without growing into the mesh.

Netting does not replace trunk protection. Deer may rub against young trunks, particularly during the fall rut. Consider using a separate trunk guard or tree support product around the trunk while the netting protects the canopy.

Check the cage throughout the growing season. Expand it when branches begin to press against the netting.

Common Installation Mistakes

Avoid these problems when installing deer netting for shrubs:

  • Netting placed directly against foliage
    Deer may still reach through the mesh.

  • Bottom edge left unsecured
    Deer can push under loose netting.

  • Weak or widely spaced stakes
    The cage may lean or collapse.

  • Large gaps at overlaps
    An open seam can become an entry point.

  • Low netting around tall shrubs
    Deer may reach over the top.

  • No seasonal inspection
    Wind, snow, falling branches, and plant growth can loosen the barrier.

Inspect the cage after storms and whenever you notice browsing. Repair small tears and replace broken ties before the opening becomes larger.

A Practical, Flexible Garden Solution

Deer netting for shrubs offers a straightforward way to protect individual plants and small garden areas. With sturdy supports, adequate clearance, a taut installation, and a firmly anchored bottom edge, lightweight netting can provide dependable protection from deer browsing.

American Nettings & Fabric, Inc. supplies netting and fabric solutions for home gardens, farms, orchards, vineyards, nurseries, and landscaping projects. With more than 40 years of family-owned experience, our team can help you select a suitable product for your plant size, layout, and intended use.

Shop Deer & Bird Netting or contact American Nettings & Fabric for practical product guidance.

Protect Your Plants With the Right Netting

Birds can reach ripe fruit quickly. A few visits to a berry patch, vineyard, or fruit tree can lead to significant crop loss. The right netting creates a simple physical barrier between your plants and the wildlife you want to keep out.

For many garden and agricultural applications, knitted netting offers important advantages over extruded netting. It is flexible, reusable, easy to handle, and suitable for covering plants with irregular shapes.

American Nettings & Fabric has supplied netting and fabric solutions for agricultural, gardening, and landscaping applications for more than 40 years. This experience helps growers and gardeners choose netting based on the crop, installation method, and level of protection required.

What Is Knitted Netting?

Knitted netting is made from strands that are looped and interlocked together to form a flexible mesh. The strands create a soft, knotless structure that can drape over plants, shrubs, trees, garden rows, and support frames.

Unlike rigid mesh products, knitted netting can move with the shape of the crop. It can be folded, rolled, cut, stored, and reused when handled properly.

American Nettings’ Knitted Bird Netting is made from Rachel-Knit HDPE and includes:

  • Green color
  • 3/4-inch square mesh
  • UV stabilization
  • Lightweight construction
  • Cutting without unraveling
  • A stated life expectancy of 5+ years

The 3/4-inch mesh is designed for common bird-protection applications involving berries, fruit trees, grapevines, vegetable gardens, and garden enclosures.

Close-up of knitted netting mesh used for garden and crop protection

Knitted Netting vs. Extruded Netting

Both knitted and extruded netting can be used for garden protection. The better choice depends on your project, budget, and expected service life.

Knitted netting

  • Soft and flexible
  • Easy to drape over plants
  • Suitable for uneven or changing crop shapes
  • Designed for repeated handling and reuse
  • Less likely to unravel when cut
  • Available in sizes for home gardens and commercial operations
  • Well suited to orchards, vineyards, berry plants, and garden rows

Extruded netting

  • Formed as a single plastic mesh
  • Typically stiffer and more rigid
  • Often selected for simple, temporary applications
  • Usually available at a lower initial cost
  • Can hold its shape well on basic frames or cages

Extruded netting may be practical for a short seasonal project. However, it can become brittle with exposure to sunlight, cold, or repeated handling. Once the mesh cracks or deforms, it may no longer provide reliable protection.

Knitted netting is often the better investment when you need a product that can be installed, removed, stored, and used again. Its flexibility also makes it easier to work around branches, vines, raised beds, and other garden structures.

Why Knitted Netting Works Well for Bird Protection

1. It drapes over plants without fighting their shape

Fruit trees and berry bushes rarely have a simple, even outline. Branches extend in different directions, and the crop changes as plants grow.

Knitted netting adjusts to these shapes. You can drape it over the canopy, bring the edges down around the plant, and secure the perimeter. This creates coverage without requiring a rigid structure for every application.

For larger fruit trees, two people can use long poles to lift the netting over the canopy. The net can then be secured around the trunk or supported with a frame.

2. It provides a reusable protection solution

Bird protection is often needed at specific times of year, especially as fruit begins to ripen. After harvest, the netting can be removed and stored for the next growing season.

The knitted structure is suitable for repeated handling. It can also be used for other seasonal applications. American Nettings’ product guidance notes that knitted bird netting can be reused for winter wrapping around shrubs and small trees.

Before storing netting, remove leaves and debris. Allow it to dry, fold it carefully, and keep it in a clean, dry location away from sharp tools or rough surfaces.

3. It helps protect a wide range of crops

Knitted netting is suitable for plants that attract birds, including:

  • Strawberries
  • Blueberries
  • Cherries
  • Grapes
  • Peaches
  • Plums
  • Nectarines
  • Figs
  • Garden vegetables

It can also cover raised beds, fruit cages, vineyard rows, and small garden structures. For larger operations, Vineyard-Bird & Bug Netting provides options for broader coverage.

4. It is lightweight and easy to install

A heavy barrier can place unnecessary weight on branches or require a complex support system. Knitted bird netting is lightweight and can be installed with basic tools and accessories.

For ground produce, simply drape the netting over the plants. Secure the edges with Fabric Staples & Pins, soil, or suitable weights. Securing the perimeter helps prevent wind from lifting the net and keeps birds from entering underneath.

For garden cages and vineyard structures, Netting Clips can connect netting to wire or join sections of netting together.

Knitted bird netting installed over berry plants for crop protection

5. It can be cut to fit the project

Garden beds and crop areas vary in size. Knitted netting can be cut to fit your application without the cut edge unraveling.

This makes it easier to create custom covers for:

  • Individual berry bushes
  • Small fruit trees
  • Raised garden beds
  • Chicken coop tops
  • Pond covers
  • Garden cages
  • Commercial crop rows

Measure the area before cutting. Allow enough material to reach the ground or frame edge so the perimeter can be secured without leaving gaps.

How to Install Knitted Bird Netting

Correct installation is essential. Netting works best when it fully covers the crop and remains secure during wind and weather.

For berries and garden rows

  1. Drape the netting over the plants.
  2. Make sure the mesh reaches below the outer edges of the crop.
  3. Secure the perimeter with soil, staples, pins, or weights.
  4. Check for openings around posts, corners, and the base of the plants.
  5. Inspect the net regularly for tears or loose sections.

For fruit trees

  1. Select a piece of netting large enough to cover the full canopy.
  2. Tie two long poles to opposite corners of the netting.
  3. Use the poles to lift and position the net over the tree.
  4. Secure the netting around the trunk or supporting structure.
  5. Check that birds cannot enter through gaps at the base or sides.

Knitted bird netting positioned over a fruit tree canopy

The net should remain clear of the fruit where possible. A simple support frame or overhead wire can help keep the material off the canopy and reduce pressure on branches.

Choose the Mesh Size for the Birds You Need to Exclude

Mesh size is an important part of bird protection. A 3/4-inch mesh is a common choice for many garden, orchard, berry, and vineyard applications. However, bird species vary in size, and the best mesh depends on the crop and the wildlife pressure at your site.

Avoid using damaged, loose, or very thin netting. Check the installation regularly, especially after strong wind. Wildlife-friendly netting should be visible, properly tensioned where appropriate, and secured so animals cannot easily become trapped underneath or inside it.

The South Australian wildlife-friendly netting guidance also emphasizes responsible selection, secure installation, and regular inspection. Local wildlife requirements may vary, so review applicable guidance for your area.

Selecting the Right Size of Knitted Netting

American Nettings offers knitted bird netting in sizes for both home gardeners and larger users, including:

  • 7.5 feet x 21 feet
  • 7.5 feet x 100 feet
  • 7.5 feet x 500 feet
  • 15 feet x 15 feet
  • 15 feet x 100 feet
  • 15 feet x 500 feet
  • 30 feet x 30 feet
  • 30 feet x 100 feet

For a small garden, a compact piece may cover one bed or berry bush. Commercial growers can select larger rolls for orchard, vineyard, or nursery applications.

Measure the length, width, and height of the area you need to cover. Add extra material for overlap and edge fastening. A close fit is useful, but cutting the net too tightly can make installation difficult and create gaps.

Green knitted bird netting protecting ripe fruit in an orchard

A Practical Choice for Gardens and Commercial Crops

Knitted netting provides a balanced solution for growers who need effective bird protection without a complicated installation. Its flexible construction makes it easy to use on plants, trees, rows, cages, and other structures.

Compared with typical extruded netting, knitted netting is generally better suited to applications that require:

  • Long-term seasonal use
  • Repeated installation and removal
  • Coverage over irregular plant shapes
  • Reliable handling and storage
  • Protection for fruit and vegetable crops
  • Home garden or commercial-scale coverage

For help choosing a suitable size or application, explore American Nettings & Fabric’s crop protection products or contact the team for practical guidance.

Protect your crop with the right coverage. Shop Knitted Bird Netting for your garden, orchard, or vineyard.

Pests can damage a healthy crop in a matter of days. Japanese beetles chew through leaves. June bugs and cicadas feed on plants and fruit trees. Wasps and other large insects can affect ripe fruit and garden crops.

Large insect netting provides a practical, chemical-free barrier. It helps keep bigger pests away while allowing air, sunlight, and water to reach your plants.

For home gardens, raised beds, orchards, vineyards, and commercial growing areas, the right netting can simplify crop protection throughout the season.

What Is Large Insect Netting?

Large insect netting is a lightweight mesh barrier designed to keep larger flying and crawling insects away from plants. It can be draped over crops, installed on hoops, or secured to a garden cage or perimeter frame.

American Nettings & Fabric’s Big Bug Netting uses:

  • Bi-axially oriented polypropylene
  • 1/6-inch square mesh
  • UV stabilization
  • Midnight blue coloring
  • A stated life expectancy of 5+ years
  • Sizes from 8 feet by 16 feet to 16 feet by 50 feet

The mesh is designed to help protect against adult June bugs, cicadas, wasps, Japanese beetles, and similar large insects.

Big bug netting installed over garden plants

Which Pests Can Large Insect Netting Help Block?

Large insect netting works best when the mesh matches the pest problem. A 1/6-inch mesh is suitable for many larger insects, but it is not intended to block every small pest.

It can help protect crops from:

  • Japanese beetles
  • June bugs
  • Cicadas
  • Wasps
  • Larger flying insects
  • Birds and other garden visitors when properly installed

It may not exclude very small insects such as aphids, thrips, leaf miners, or tiny flea beetles. For these pests, a finer insect screen is usually a better choice.

American Nettings & Fabric’s “Bug Out” Garden Insect Screen is designed for smaller insects. It uses a fine mesh, offers 82% light transmission, and allows airflow without trapping heat like a floating row cover.

Large Mesh or Fine Mesh?

Use this simple guide:

Main concern Recommended approach
Japanese beetles, cicadas, June bugs, and wasps Large insect netting
Cabbage white butterflies and larger moths Butterfly or insect netting with a suitable mesh
Flea beetles, aphids, and other small insects Fine insect screen
Frost or temperature protection Floating row cover instead of insect netting
Birds and larger animals Bird netting or fencing, depending on the application

The Royal Horticultural Society’s insect-proof mesh guide notes that mesh size determines which insects can be excluded. It identifies standard mesh around 1.3–1.4 mm, fine mesh around 0.8 mm, ultrafine mesh around 0.3–0.6 mm, and butterfly netting around 4–7 mm.

American Nettings & Fabric can help you select the right material when your crop faces more than one type of pest.

Why Use Netting Instead of Chemicals?

Large insect netting creates a physical barrier instead of relying on insecticides. It can be a useful part of an integrated pest management plan for organic gardens, commercial farms, nurseries, and home growing areas.

Benefits include:

  • No pesticide residue on the crop
  • Less dependence on chemical sprays
  • Reusable protection for multiple growing seasons
  • Simple installation and removal
  • Protection from several pest types at the same time
  • Reduced feeding damage to leaves, stems, flowers, and fruit
  • Less disruption to beneficial insects outside the covered area

Agriculture and Agri-Food Canada evaluated polyethylene mesh row covers for brassica crops, including broccoli, kale, and radish. The trials tested several mesh gauges and found that netting reduced damage from cabbage maggot, cabbageworm, and diamondback moth in broccoli. The project concluded that insect netting can help protect brassica crops without insecticide applications.

Read the full Agriculture and Agri-Food Canada row-cover project.

How to Use Large Insect Netting Over a Garden Bed

A secure installation is essential. Any opening can allow pests to enter the protected area.

1. Install the netting early

Cover plants before pest activity becomes heavy. For brassicas, install the netting soon after transplanting or emergence. For fruiting plants, cover them before large insects begin feeding or fruit starts to ripen.

If pests are already inside the netting, remove them before sealing the crop.

2. Build enough height

Use hoops, posts, wire, or poly line to support the netting above the crop. This gives plants room to grow and prevents leaves and fruit from pressing against the mesh.

Supports are especially useful for:

  • Broccoli
  • Cabbage
  • Cauliflower
  • Kale
  • Berry bushes
  • Young fruit trees
  • Raised-bed crops
  • Long garden rows

The Big Bug Netting garden cage instructions recommend posts around the garden area, with spacing not exceeding 12 feet. A taut wire or poly line can support the top edge and help keep the netting in place.

3. Leave extra material around the edges

Measure the bed, frame, and crop height before ordering. Add enough material to reach the ground on every side with extra room for securing.

As a general practice:

  • Measure the full width and length of the area
  • Include the height of hoops or posts
  • Add extra material for overlap and anchoring
  • Allow room for crop growth
  • Avoid stretching the mesh too tightly

Stretching can widen the openings and reduce protection. The RHS recommends leaving slack for plant growth and securing the edges under soil or against a ground-level board.

4. Seal every edge

Secure the bottom edge with soil, boards, weights, ground staples, or clips. Check the ends of tunnels carefully. Loose corners and open ends are common entry points for insects.

American Nettings & Fabric offers Fabric Staples for securing netting to the ground. The reusable metal staples are 6 inches long and made from 11-gauge steel.

For framed installations, Netting Clips can connect netting to wire or join sections together. Net-to-wire clips are useful when the netting must be fastened to poly line or perimeter wire.

Large insect netting covering garden rows and crop plants

Using Netting on Brassicas

Brassicas include cabbage, broccoli, cauliflower, kale, Brussels sprouts, collards, and related crops. These plants commonly attract cabbage whites, diamondback moths, cabbageworms, flea beetles, and cabbage root flies.

Large insect netting can help with larger butterflies and moths. However, if flea beetles or smaller insects are also a concern, choose a finer screen.

For broad brassica protection:

  1. Prepare the bed and remove weeds.
  2. Inspect seedlings for existing pests.
  3. Install hoops or a crop frame.
  4. Cover immediately after planting.
  5. Secure all edges.
  6. Open the cover only for weeding, inspection, or harvest.
  7. Check the plants regularly for damage and disease.

Keep the mesh from resting directly on the foliage. Some insects may lay eggs through a mesh if plant leaves touch it. A raised frame also protects growing points and reduces wear on the netting.

Managing Airflow, Light, and Moisture

Netting allows air and light to reach the crop, but every covering changes the growing environment slightly.

Large insect netting generally allows more airflow and light than heavier fabric covers. The fine “Bug Out” Garden Insect Screen is listed at 80% porosity and 82% light transmission, making it suitable when small-pest protection and ventilation are priorities.

Inspect covered crops regularly for:

  • Excess moisture
  • Slugs and snails
  • Leaf spots
  • Powdery mildew
  • Damaged or touching foliage
  • Insects that may have entered before installation

Water and feed plants as needed. Remove the cover when pollination is required for insect-pollinated crops such as squash and strawberries.

How to Choose the Right Size

Large insect netting is available in sizes for small beds and larger growing areas. American Nettings & Fabric offers Big Bug Netting in:

  • 8 feet by 16 feet
  • 8 feet by 50 feet
  • 16 feet by 16 feet
  • 16 feet by 50 feet

For commercial rows, vineyards, orchards, or larger crop areas, explore the crop protection collection and contact the American Nettings & Fabric team for help with sizing and application planning.

A properly sized piece reduces seams, simplifies installation, and provides better edge coverage.

Protect Your Crops With a Practical Barrier

Large insect netting is a straightforward way to reduce feeding damage from beetles, wasps, cicadas, and other larger pests without chemical sprays. The best results come from choosing the right mesh, installing it early, supporting it above the plants, and sealing every edge.

American Nettings & Fabric has provided netting and specialty fabric solutions for agriculture, gardening, and landscaping for 40 years. Products are available in sizes ranging from retail packages to commercial rolls, with practical guidance for both home growers and agricultural operations.

Shop Big Bug Netting or contact American Nettings & Fabric to find a suitable crop protection solution.

Big bug netting product mesh for protecting crops from large insects

FALL GARDEN PREP

A good bush wrap for winter can help protect shrubs and small trees from several seasonal problems at once. The right cover can reduce branch breakage, discourage deer browsing, limit wind exposure, and help protect evergreen foliage from winter burn.

The key is choosing the right material and installing it correctly. A wrap should protect the plant without crushing the branches or trapping moisture against the foliage.

American Nettings & Fabric supplies practical netting and fabric solutions for home gardens, landscapes, orchards, and commercial growing operations. With 40 years of family-owned experience, we can help you choose a suitable size and material for your application.

WHY SHRUBS NEED WINTER PROTECTION

Winter damage often comes from more than low temperatures.

Evergreen shrubs continue to lose moisture through their foliage during winter. Frozen soil can limit the water available to the roots, while cold wind and bright sun increase moisture loss. This can lead to brown or bleached foliage, especially on exposed sides of arborvitae, yew, hemlock, juniper, and other evergreens.

Deer can also cause serious damage when natural food becomes less available. They may browse on evergreen branches, shrubs, small trees, and berry plants. In late fall, bucks can also rub their antlers against young tree trunks and branches.

Snow and ice add another risk. Heavy accumulation can bend or break branches, particularly on upright or densely branched shrubs.

A simple protective structure helps address these seasonal concerns.

Close view of black knitted deer netting installed around a small evergreen shrub with an air gap

CHOOSE THE RIGHT TYPE OF BUSH WRAP FOR WINTER

There are two practical approaches for protecting shrubs.

Loose shrub wrap

A lightweight knitted wrap works well for compact shrubs and small trees. It can help hold branches together, reduce breakage from snow, and discourage browsing.

American Nettings’ Shrub Wrap is made from lightweight knitted polyethylene. It is available in:

  • 19 inches x 50 feet
  • 19 inches x 250 feet
  • One-season life expectancy
  • Suitable for shrubs, bushes, and small trees

The wrap is installed in a spiral around the plant. Each layer overlaps the previous layer to reduce gaps.

This method is useful when the main concerns are:

  • Snow and ice damage
  • Branch breakage
  • Short-term deer protection
  • Transporting or moving shrubs
  • Seasonal protection for compact plants

Framed deer netting for shrubs

For heavier deer pressure or sensitive evergreens, a framed barrier may be the better option. Stakes or posts create space between the plant and the netting. This air gap allows better circulation and keeps the material from rubbing directly against the foliage.

Deer & Bird Netting is a lightweight black polypropylene mesh with 3/4-inch square openings. It is UV stabilized and has a listed life expectancy of four or more years.

It can be used to:

  • Surround individual shrubs
  • Protect berry plants and garden beds
  • Create a temporary garden cage
  • Cover shrubs and small trees
  • Provide seasonal deer and bird protection

For high deer pressure, a taller and stronger perimeter fence may be more suitable. See the Heavy Duty Deer Fence for larger or more permanent installations.

HOW TO WRAP A SHRUB FOR WINTER

Follow these steps for a simple seasonal installation.

1. Water the shrub before the ground freezes

Healthy plants handle winter stress better than plants that enter winter dry. Water shrubs thoroughly in late fall, especially after a dry growing season.

Continue normal watering until the ground begins to freeze. Avoid creating soggy conditions around the roots.

University of Minnesota Extension recommends watering thoroughly before freeze-up and applying mulch around trees and shrubs. Its guidance also notes that winter sun and wind can dry evergreen foliage while the roots remain frozen.

2. Add a layer of mulch

Apply approximately 3 to 4 inches of organic mulch over the root zone. Keep the mulch away from the trunk or main stems.

Mulch helps moderate soil temperature and reduce moisture loss. It can also reduce damage from repeated freezing and thawing.

Do not create a tall mound directly against the plant. Leave a small open area around the base.

3. Remove damaged branches

Before wrapping, remove dead or damaged branches with clean pruning tools. Avoid heavy pruning late in the season, particularly on evergreen shrubs.

Late-season pruning can encourage new growth that may not harden before winter. Keep the preparation simple and remove only what is necessary.

4. Tie branches gently if needed

For upright shrubs or plants that may collect heavy snow, gently bring the branches together with soft garden twine.

Do not tie branches tightly. The goal is to reduce spreading and breakage, not to compress the plant.

5. Start at the bottom

When using Shrub Wrap, begin at the bottom of the shrub.

Wrap upward in a loose spiral. Allow the material to overlap by about half its width. This helps eliminate open gaps while keeping the installation stable.

The product instructions recommend continuing upward until the shrub is covered, then cutting the netting and tucking or tying off the loose end.

6. Keep the wrap secure

Check the bottom and top of the wrap after installation. Wind can lift loose material and create openings for deer.

Use appropriate ties, Fabric Staples, or other fasteners where needed. Do not use fasteners that cut into branches or bark.

For a framed installation, place three or four stakes around the shrub. Keep the stakes several inches away from the outer branches. Attach the netting to the stakes and close the bottom around the mulch line.

HOW TO USE DEER NETTING FOR SHRUBS

Deer netting for shrubs should form a complete barrier around the plant.

A loose sheet draped over the top may help with browsing, but deer can sometimes reach through openings or push underneath the material. Secure the edges and check the installation after strong wind or snow.

For individual shrubs:

  1. Place stakes around the plant.
  2. Leave space between the foliage and the netting.
  3. Pull the netting moderately taut.
  4. Secure it to each stake.
  5. Close gaps at the base.
  6. Add a top section if deer can reach over the sides.
  7. Inspect the barrier regularly.

American Nettings’ Netting Clips can help join or secure netting sections. Poly Line can also provide support along the top of a larger garden enclosure.

For a full garden area, use posts and support lines to create a stable fence. The company’s product guidance recommends post spacing not exceeding 12 feet for Deer & Bird Netting.

A physical barrier is usually more dependable than relying only on deer repellents. In areas with severe deer pressure, use a taller, stronger fence and follow local recommendations for safe installation.

Black deer netting creating a low-visibility barrier around a landscape area

BURLAP SCREEN OR NETTING WRAP?

Burlap and netting serve slightly different purposes.

A burlap screen is useful for blocking winter wind and bright sun from exposed evergreen foliage. It should usually be installed on the windward or sunny side of the plant, rather than wrapped tightly around the foliage.

A netting wrap is useful for:

  • Holding branches together
  • Reducing snow breakage
  • Creating a deer barrier
  • Protecting shrubs and small trees
  • Providing a lightweight seasonal cover

For a sensitive evergreen, use stakes to keep the protective material away from the foliage. Leave the top open when possible so the plant receives air and light.

Do not use airtight plastic sheeting as a shrub wrap. Plastic can trap moisture, increase heat on sunny days, and reduce air circulation.

WHEN TO INSTALL AND REMOVE WINTER WRAP

Install winter protection in late fall, after the plant has begun to harden off and before severe weather arrives. The exact timing depends on your climate, but the wrap should be in place before repeated deep freezes, heavy snow, or winter deer pressure.

Check the plant after:

  • Strong wind
  • Heavy snow
  • Freezing rain
  • Rapid temperature changes
  • Deer activity

Adjust the material if it is rubbing against branches, pressing heavily on the plant, or creating an opening at the base.

Remove or open the protection in early spring once severe freezing weather has passed. Leaving a wrap in place too long can reduce light and air movement and may cause the plant to begin growing under cover.

FIND THE RIGHT SIZE FOR YOUR SHRUBS

The best material depends on the plant size, deer pressure, exposure, and expected snow load.

American Nettings & Fabric offers sizes ranging from retail packages to commercial rolls. Products are available for homeowners, landscapers, nurseries, farms, orchards, and vineyards.

Our team can help you compare:

  • Shrub Wrap
  • Deer & Bird Netting
  • Deer & Poultry Fencing
  • Natural Burlap
  • Crop Cover
  • Heavy-duty deer fencing
  • Netting clips and support accessories

With American-made quality, practical product knowledge, and four decades of experience, American Nettings & Fabric helps you select a solution suited to your plants and property.

Protect your shrubs before winter arrives. Shop shrub wrap and deer netting or contact American Nettings for product guidance.

FURTHER WINTER-CARE GUIDANCE

For additional plant-care information, review:

A fruit tree can produce a generous harvest: if birds do not reach the fruit first. The right bird netting tree setup creates a physical barrier while keeping the net smooth, secure, and easier to monitor.

This five-minute method works best for small and medium backyard fruit trees after the netting, poles, and ties are ready. Commercial orchards and vineyards use the same basic principles on a larger scale.

What You Need

Prepare these materials before you begin:

  • Correctly sized knitted bird netting
  • Two long, lightweight poles
  • Soft garden ties, twine, or reusable straps
  • Netting clips, zip ties, or fabric staples
  • A ladder for taller trees
  • Optional: ground staples, rocks, or mulch for securing edges

American Nettings & Fabric offers American-made knitted netting for home gardens, orchards, vineyards, and commercial crop protection. Our sizes range from retail packages to commercial rolls, so you can choose a practical solution for one tree or a larger growing operation.

Shop Knitted Bird Netting

Green knitted bird netting product for fruit trees and gardens

1. Choose the Right Time

Do not install bird netting while your fruit tree is in bloom. Pollinators need access to the flowers for fruit production.

Wait until the petals have fallen and the fruit has begun to develop. Netting is usually installed before the fruit starts to ripen and attract birds. Local pest timing can vary, so adjust the schedule for your crop and region.

Before covering the tree:

  • Remove damaged or fallen fruit.
  • Complete any planned pruning.
  • Thin crowded fruit if needed.
  • Check the tree for birds, nests, or other wildlife.
  • Inspect the net for tears or large openings.

If a bird or animal is already inside the canopy, gently encourage it to leave before installing the net.

2. Measure Before You Buy

Too little netting creates gaps. Too much netting can drag on branches and become difficult to secure.

Measure:

  1. The tree’s height from the ground to the highest branch.
  2. The tree’s widest spread from side to side.
  3. Extra length needed to reach the trunk or ground on every side.

A simple starting formula is:

Tree height + tree width, multiplied by two

For example, an 8-foot-tall tree that is 7 feet wide needs approximately:

(8 + 7) × 2 = 30 feet

A 30-foot by 30-foot piece would provide full coverage with room to secure the edges. When in doubt, choose a larger size. American Nettings also provides a netting size guide with examples for fruit trees, hoop tunnels, and garden enclosures.

For a large tree, it may be more practical to cover only the fruiting section or divide the canopy into smaller sections. Commercial growers can also use larger orchard, vineyard, multi-row, or drape netting systems.

3. Tie the Poles to the Net

Lay the netting flat on a clean area beside the tree. Avoid dragging it through thorny plants, rough gravel, or sharp branches.

Tie one pole to each corner on one end of the net. Keep the ties secure but easy to remove. The poles act as handles and help you lift the net over the canopy without pulling it through the branches.

For a small tree, one person may be able to complete this step alone. Two people make the process faster and reduce the chance of snagging the net.

4. Drape the Net Over the Tree

Stand on opposite sides of the tree. Lift the poles together and guide the net over the top of the canopy.

Pull the net evenly down both sides. It should cover the tree completely without becoming tightly wrapped around individual branches.

For better protection:

  • Keep the net as smooth as possible.
  • Avoid loose folds or hanging loops.
  • Keep the net slightly away from fruit and foliage when practical.
  • Do not pull so tightly that branches bend under strain.
  • Do not leave sections of net resting in a way that creates pockets.

American Nettings’ Knitted Bird Netting is a soft, flexible green mesh designed for fruit trees, berry plants, grapevines, garden rows, and similar applications. It is UV stabilized and can be cut without unraveling. The product page lists a 3/4-inch mesh and a life expectancy of 5+ years under suitable conditions.

Mesh size should always match the wildlife in your area. A mesh that is suitable for one bird problem may not be suitable for small birds, bats, or other animals. Ask an expert if you are unsure.

Fruit tree covered with bird netting

5. Close the Net Around the Trunk

This is the most important step for preventing birds from entering the canopy.

Gather the lower edges of the net around the trunk. Secure them with a soft, weather-resistant tie. The tie should close the opening without cutting into the bark.

Walk around the entire tree and look for:

  • Gaps between the net and trunk
  • Open corners
  • Loose side edges
  • Sections lifted above the ground
  • Tears or damaged mesh
  • Netting caught on nearby branches or structures

Close side openings with netting clips, soft ties, or carefully placed zip ties. If the net reaches the ground, secure the perimeter with staples, smooth rocks, or a light covering of soil or mulch.

Do not use sharp wire directly against the trunk. Avoid tight knots that can girdle growing branches or bark.

WILDLIFE-SAFETY CHECKLIST

A properly installed bird netting tree barrier should be easy to see, easy to inspect, and free of loose sections.

Check the net:

  • Every day during the first several days.
  • After strong wind, rain, or hail.
  • Whenever you notice unusual bird activity.
  • Before and during harvest.
  • After moving or adjusting the net.

The net should be taut enough to prevent deep pockets but not so tight that it strains the tree. Remove fallen fruit from inside the net. Fallen fruit can attract animals and may create extra pressure against the mesh.

If you find an animal trapped in the net, do not pull it free by force. Keep people and pets away, and contact a local wildlife rehabilitator, animal control service, or other qualified wildlife professional for guidance.

Remove the net soon after harvest. Shake off leaves and debris, inspect it for damage, fold it neatly, and store it in a dry location for the next season.

Direct Drape for Very Small Trees

A support frame is the preferred option because it keeps the net away from the canopy. For a very small, compact tree, direct draping may be suitable.

Use the same basic process:

  1. Lay the net flat.
  2. Lift it evenly over the tree.
  3. Smooth out loose folds.
  4. Gather the edges around the trunk.
  5. Close all openings.
  6. Secure the perimeter.

Never leave a loose net thrown over a tree with open sides. That setup may allow birds and small animals to enter but make it difficult for them to escape.

Options for Orchards and Vineyards

The five-minute method is useful for individual trees and small plantings. Commercial growers usually need stronger support, larger dimensions, and a repeatable installation system.

American Nettings & Fabric supplies:

  • Retail packages for home gardeners
  • Larger rolls for commercial crop protection
  • Vineyard multi-row netting
  • Green drape netting
  • Net-to-wire and net-to-net clips
  • Custom guidance for orchard and vineyard applications

Our Vineyard Multi-Row & Drape Netting includes options for larger vineyard and orchard projects. Multi-row netting is designed for heavy-duty applications, while green drape netting is made for large-scale bird protection.

Bird netting installed over commercial vineyard rows

The right product depends on crop layout, row spacing, trellis design, target birds, installation method, and how often the net will be removed. American Nettings & Fabric has more than 40 years of family-owned experience helping growers and gardeners select suitable netting and fabric solutions.

Get the Right Bird Netting for Your Tree

A good installation does more than cover the fruit. It closes entry points, reduces tangles, protects the tree, and makes regular inspection simple.

For one backyard cherry tree, a retail package may be enough. For a commercial orchard, vineyard, or nursery, larger rolls and specialized systems can make installation more efficient.

Discover Bird Protection Netting

Need help selecting a size or product? Contact American Nettings & Fabric for practical guidance based on your tree, crop, and installation needs.

Ripe cherries protected by knitted bird netting

April - Newsletter Header Shop Now!

Knitted Fabric Deco Pots

Deco pot-5 Click Here to Buy!

Crop Covers

crop cover application Click Here to Buy! other promos header recipes header

Crock Pot Chicken Pot Pie

Click here for Recipe !

Lemon Blueberry Sweet Rolls

Click here for Recipe !

Protecting Arborvitae and Evergreens From Winter Deer Damage

Winter can be hard on arborvitae and other evergreen shrubs. When snow covers natural food sources, deer may browse heavily on lower branches. Cold winds and bright winter sun can also dry out foliage, causing winter burn.

The good news is that winter protection for evergreens can be simple and practical. A well-planned barrier, proper watering, and a seasonal inspection routine can help protect your plants before serious damage occurs.

Why Arborvitae Need Winter Protection

Arborvitae, yews, pines, and other evergreens remain attractive food sources when many plants are dormant. Deer often browse from the top down and may reach several feet into a shrub. Snow buildup can give them additional height.

Winter conditions create other risks:

  • Deer browsing on green foliage
  • Antler rubbing on young trees
  • Branch breakage from heavy snow
  • Drying winds
  • Bright winter sun
  • Frozen soil that prevents roots from replacing lost moisture

According to Iowa State University Extension, arborvitae and yews are especially susceptible to winter desiccation, also called winter burn. The foliage loses moisture through wind and sun, while frozen soil limits the plant’s ability to absorb more water.

Snow-covered evergreen branches illustrating winter exposure and moisture loss

Start With Physical Exclusion

The most dependable way to prevent arborvitae deer damage is to keep deer away from the plant. Physical barriers work more consistently than repellents because they do not depend on scent, weather, or deer tolerance.

Choose the barrier based on the size of the planting.

Individual shrubs

For one or several arborvitae, use a cage or netting barrier around each plant. The barrier should:

  • Stand high enough to prevent deer from reaching over it
  • Remain far enough from the foliage that deer cannot browse through the mesh
  • Be secured to stakes or posts
  • Stay close to the ground with no easy opening underneath
  • Allow enough room for snow and branch movement

For individual shrubs, seasonal netting or shrub wrap can be easier to install than a full property fence.

American Nettings & Fabric’s Shrub Wrap is made from lightweight knitted polyethylene. It helps reduce branch breakage from snow and provides seasonal protection from deer, ice, and salt damage. It is available in 19-inch-wide rolls in 50- and 250-foot lengths.

Larger planting areas

If you are protecting a hedge, garden, nursery area, or group of evergreens, a perimeter deer fence may be more practical.

A full deer barrier should generally be about 8 feet high where deer pressure is significant. The Heavy Duty Deer Fence is made from UV-stabilized polypropylene and is available in 7.5-foot widths and long rolls. For some properties, a 7.5-foot fence may provide a practical starting point. Heavy deer pressure, uneven ground, and open approaches may require additional height or layout adjustments.

For a lighter seasonal installation, Deer & Bird Netting can be used around smaller gardens and plantings. Select the material according to the size of the area, the amount of deer pressure, and how often the barrier will be inspected.

Deer exclusion netting forming a visible barrier between wildlife and a protected planting area

How to Wrap Arborvitae for Winter

Wrapping can help protect arborvitae from deer and snow, but the installation should not crush the foliage or trap moisture.

For a seasonal shrub wrap:

  1. Inspect the plant and remove broken branches.
  2. Start near the base of the shrub.
  3. Wrap upward in a loose spiral.
  4. Overlap each pass to reduce open gaps.
  5. Continue to the top of the plant.
  6. Tuck or tie off the loose end.
  7. Check that the material is secure but not cutting into branches.

The Shrub Wrap product instructions recommend overlapping the material by about half its width as you move upward. This helps create a consistent protective layer while allowing the wrap to follow the shape of the plant.

For winter-burn protection, do not tightly cover the foliage with an airtight material. A breathable screen placed around the plant is usually a better approach. Iowa State University Extension recommends setting a wind screen at least 6 inches away from the foliage rather than wrapping burlap directly around the plant.

A screen can be made with:

  • Four stakes or support posts
  • Woven fencing or netting
  • Burlap or another breathable fabric
  • Secure ties or fasteners

Place the screen on the side facing the strongest winter wind and afternoon sun. If deer pressure is high, extend the barrier around the full plant.

Water Before the Ground Freezes

Healthy, hydrated plants are better prepared for winter stress. Water arborvitae deeply during dry fall periods and continue watering as needed until the ground freezes.

Focus on the root zone rather than spraying the foliage. Give the water time to soak into the soil. Newly planted evergreens need particular attention because their root systems are still developing.

A layer of mulch can help moderate soil temperature and reduce moisture loss. Apply mulch around the root zone, but keep it away from the trunk and main stems. Avoid piling mulch directly against the plant.

Watering cannot stop deer browsing, but it can reduce the risk of winter burn when combined with wind protection and proper site care.

Use Repellents as Backup Protection

Deer repellents may provide additional help, especially around small plantings. They should support a physical barrier rather than replace one.

For best results:

  • Apply repellent before deer begin regular browsing
  • Follow the product label for temperature and weather limits
  • Cover the foliage from the top down to the browsing height
  • Reapply after rain, snow, or thawing conditions
  • Change products or scent types occasionally to reduce habituation

Repellents are less reliable during extended winter weather. Freezing temperatures, snow, and repeated storms can make applications difficult. If deer are already feeding on your arborvitae, install a barrier promptly.

Protect Against Snow and Ice

Heavy, wet snow can split or bend multi-stemmed evergreens. A loose support wrap can help hold branches together during winter storms.

Inspect the plant after significant snowfall. If snow is heavy, gently brush it away with an upward motion. Avoid pulling branches downward or shaking the plant forcefully.

Do not allow snow from a roof, driveway, or walkway to pile onto the shrub. The added weight can cause breakage even when the plant is otherwise healthy.

Remove seasonal support materials in spring after severe winter conditions have passed. Leaving wraps or screens in place too long can restrict growth and reduce airflow.

Check for Deer Damage During Winter

Walk around protected plants every few weeks. Look for:

  • Browsed branch tips
  • Missing foliage on the lower portion of the plant
  • Torn or pulled netting
  • Loose ties
  • Gaps beneath a cage or fence
  • Snow buildup that allows deer to reach higher
  • Broken branches
  • Browsing outside the protected area

Evergreen foliage showing the type of winter setting where deer browsing and cold exposure may occur

If you find fresh damage, repair the barrier immediately. Deer may return to the same plant once they identify it as a dependable food source.

Can a Damaged Arborvitae Recover?

Recovery depends on how much foliage and how many growing points remain. Lightly browsed branches may produce new growth in spring. Heavily damaged areas may remain bare if the buds have been removed.

The best response is to:

  1. Prevent additional browsing.
  2. Wait until spring growth appears.
  3. Prune only dead or clearly damaged material.
  4. Avoid heavy shaping before you can assess new growth.
  5. Keep the plant watered during dry periods.

Do not assume that a brown section will fill in quickly. Arborvitae may recover gradually, and bare areas without viable buds may not produce much new growth.

Winter Protection Checklist

Before winter

  • Inspect arborvitae and other vulnerable evergreens.
  • Water deeply during dry fall weather.
  • Install cages, netting, or a deer fence.
  • Set up a breathable wind screen where needed.
  • Secure loose branches if heavy snow is likely.
  • Apply deer repellent as a secondary measure.

During winter

  • Check barriers after wind, snow, and thawing.
  • Repair gaps and loose fasteners.
  • Remove heavy wet snow carefully.
  • Watch for new browsing.
  • Keep snow from piling against the plant.

In spring

  • Remove seasonal wraps and screens.
  • Inspect for broken or dead branches.
  • Wait for new growth before major pruning.
  • Adjust the protection plan for the next winter.

Protect Your Evergreens Before Damage Begins

Winter protection for evergreens works best when installed before deer establish a feeding pattern. A suitable netting barrier can protect individual arborvitae, while a taller deer fence can secure an entire garden or landscape area.

Explore American Nettings & Fabric’s fencing products and crop protection products for seasonal and long-term solutions. With more than 40 years of experience supplying netting and fabric for gardens, farms, nurseries, and landscapes, our team can help you choose an option that fits your plants and property.

Protect your arborvitae early. Reduce deer damage. Prepare your evergreens for winter.

Bird Netting vs. Scare Tape: Which Actually Protects Your Fruit?

Birds can damage a fruit crop quickly. A few feeding birds may remove ripe berries, peck holes in cherries, or knock fruit from branches before harvest. This makes bird protection an important part of orchard, vineyard, and garden planning.

Two common options are bird netting and scare tape. Reflective tape is inexpensive and simple to install. Bird netting costs more and requires careful setup. So which one actually protects fruit?

The short answer

Bird netting provides the most reliable protection because it physically blocks birds from reaching the crop.

Scare tape may reduce bird activity for a short period. However, birds can become used to reflective movement, especially when the tape stays in one location. For high-value fruit, heavy bird pressure, and crops that need dependable protection, properly installed bird netting is the stronger choice.

Scare tape can still be useful as a low-cost deterrent or as an extra layer around a netted area.

Bird netting vs. scare tape at a glance

Feature Bird netting Scare tape
Main action Creates a physical barrier Creates flashes, movement, and rustling
Protection level High when fully installed and secured Variable and usually temporary
Best for Cherries, blueberries, grapes, orchards, and valuable crops Light bird pressure or short protection periods
Bird habituation Birds cannot simply adapt around a closed barrier Effectiveness may decline as birds become familiar with it
Installation Requires measuring, supports, and secure edges Fast to hang from posts, branches, or wire
Reuse Can be removed, stored, and reused May need replacement or repositioning
Best role Primary crop protection Supplement or short-term deterrent

How scare tape works

Scare tape, also called reflective tape or flash tape, uses bright reflections and movement to make a planting area feel less safe to birds. Wind causes the strips to twist and flash. Some products also create a rustling sound.

This approach can work when:

  • Bird pressure is light or moderate
  • Fruit is vulnerable for only a short time
  • You can check and reposition the tape often
  • Some crop loss is acceptable
  • A physical netting system is not practical

Reflective tape is most useful when it is installed before birds begin feeding heavily. Once birds establish a regular feeding pattern, it may be harder to move them away.

Reflective tape strung over blueberry bushes to deter birds

The main limitation: birds adapt

Birds are intelligent and observant. A shiny strip that moves in the wind may be alarming at first, but birds can learn that it does not present a real threat. If the tape remains in the same position, its effect may decrease over time.

The University of New Hampshire bird damage guide recommends changing the location or type of scare device frequently. Its guidance also describes reflective materials as visual deterrents with limited effectiveness compared with netting.

Scare tape may need to be:

  • Moved around the crop
  • Combined with other deterrents
  • Replaced when it becomes dull or damaged
  • Removed when it is no longer needed
  • Checked so it does not tangle in branches or equipment

For a small garden with a few berries, that may be manageable. For a commercial planting or a heavily targeted cherry tree, temporary deterrence may not provide enough protection.

Why bird netting works more consistently

Bird netting does not depend on a bird being frightened. It prevents access.

When netting fully covers the crop and the edges are secured, birds cannot reach the fruit from above, the sides, or underneath. This makes it the most dependable choice for crops such as:

  • Blueberries
  • Cherries
  • Grapes
  • Raspberries
  • Strawberries
  • Peaches and plums
  • Figs and other tree fruit

The Oregon State University Extension guide on nonlethal bird deterrents describes netting as “absolute exclusion” and identifies it as the most effective method for reducing bird damage to fruit and berry crops.

Green bird netting used to protect berries and garden crops

The value of complete coverage

Bird netting works best when it encloses the entire crop area. A piece placed only across the top of a tree or berry row may leave openings along the sides or ground.

Before installing netting, measure:

  • The full length and width of the planting
  • The height of the tree, bush, or support frame
  • The sides and ends that need coverage
  • Extra material for ground anchoring
  • Openings for harvest and maintenance

For berry bushes and garden beds, a frame made from posts, hoops, wire, or poles can hold the net above the foliage. This helps reduce contact with fruit and leaves. It also creates more room for harvesting and inspection.

Secure the lower edge with suitable fabric staples and pins, soil, boards, or other weights. Close gaps around posts, trunks, corners, and uneven ground.

Choosing the right bird netting

American Nettings & Fabric’s Knitted Bird Netting is designed for fruit, garden, orchard, vineyard, and crop protection applications.

Product details include:

  • UV-stabilized Rachel-Knit HDPE
  • Flexible green construction
  • 3/4-inch square mesh
  • Material that can be cut without unravelling
  • Sizes from smaller packages to commercial rolls
  • Listed life expectancy of 5+ years

The correct mesh depends on the crop, bird species, and application. A 3/4-inch mesh is suitable for many common fruit and garden uses. If smaller birds are entering the planting, review the mesh opening carefully and ask a netting specialist for help choosing a suitable option.

For vineyards and larger rows, Vineyard Multi-Row & Drape Netting offers options for larger agricultural installations.

Installation matters more than the product alone

Even strong bird netting cannot protect fruit if birds can enter through an open side or loose bottom edge.

Use these installation practices for better results:

Install before fruit fully ripens

Apply netting when fruit begins to develop color but before birds begin feeding heavily. For berries, this is often before the fruit turns fully blue, red, or purple. Early installation helps prevent birds from establishing the planting as a regular food source.

Support the netting above the plants

A support frame reduces sagging and helps prevent birds from reaching fruit through the mesh. It also reduces rubbing against branches and makes seasonal removal easier.

Close every edge

Inspect the ground line, corners, seams, and access points. Use netting clips to join sections or attach netting to wire. A planned opening or curtain section makes harvesting easier while keeping the enclosure closed when no one is working inside.

Bird netting secured over a garden enclosure

Inspect the enclosure during the season

Check for:

  • Tears or holes
  • Loose clips
  • Sagging sections
  • Openings at the base
  • Branches pushing against the mesh
  • Netting displaced by wind or rain

Repair small damage promptly. Keep the netting supported and secured to reduce the risk of wildlife becoming caught.

Should you use scare tape with bird netting?

You can use scare tape as a supplement, but it should not replace a complete physical barrier when crop protection is important.

Reflective tape may help reduce bird activity around:

  • The outside of a netted orchard
  • The perimeter of a berry planting
  • Open areas near a vineyard
  • A short-term harvest zone
  • Crops with light bird pressure

It may also provide an early warning effect by discouraging birds before they reach the netting. However, the net remains the primary protection.

Avoid relying on scare tape alone for a high-value crop that birds have already found. Cherries, blueberries, and grapes can attract repeated feeding, and even a short period of heavy activity may cause significant crop loss.

Bird netting or scare tape: which should you choose?

Choose bird netting when:

  • You need dependable protection
  • Bird pressure is heavy
  • The crop has high value
  • You are protecting cherries, blueberries, grapes, or other attractive fruit
  • You want a reusable solution
  • You can install supports and secure the perimeter

Choose scare tape when:

  • Bird pressure is light
  • You need a quick, temporary deterrent
  • The protected area is small
  • Some crop loss is acceptable
  • You can reposition the tape regularly
  • You are using it alongside another protection method

For most fruit trees and berry plantings, the practical answer is clear: use bird netting as the primary defense and treat scare tape as a supporting tool.

Protect your fruit before birds begin feeding

The best time to plan bird protection is before fruit reaches peak ripeness. Measure the area, choose suitable netting, prepare supports, and close every edge.

Explore Knitted Bird Netting for home gardens, orchards, vineyards, and commercial growing areas. For help selecting a size or planning a larger installation, contact American Nettings & Fabric.

Sources

Chicken Coop Netting: Protecting Your Flock From Hawks and Predators

A secure chicken run gives your flock room to move while helping protect it from hawks, owls, raccoons, foxes, dogs, and other predators. The right chicken coop netting can form an effective overhead barrier, but it works best as part of a complete enclosure with strong side fencing, secure gates, and a protected ground line.

Whether you keep a few hens at home or manage a larger poultry area, poultry netting for coops should be chosen and installed with your local predator risks in mind.

WHY USE CHICKEN COOP NETTING?

An open-top run may look secure from the ground, but hawks and owls can enter from above. A properly installed overhead net blocks access to the run while allowing sunlight and airflow to reach your flock.

Chicken coop netting can help you:

  • Protect hens from hawks and other aerial predators
  • Keep chickens contained in a defined area
  • Create a safer space for free movement and foraging
  • Reduce the risk of birds wandering into gardens or nearby areas
  • Cover large runs without building a solid roof
  • Add a flexible barrier to temporary or permanent enclosures

Netting also provides a practical way to cover irregular spaces. With suitable support posts and fastening points, it can be installed over backyard runs, garden pens, pasture areas, and poultry shelters.

A deer and chicken separated from outdoor space by protective mesh fencing

OVERHEAD NETTING AND SIDE FENCING SERVE DIFFERENT PURPOSES

Chicken coop netting is especially useful for stopping aerial access. It should not be expected to handle every type of predator on its own.

A complete poultry enclosure usually includes:

Overhead poultry netting

This forms the roof of the run. It helps stop hawks, owls, and other birds of prey from entering from above.

Side fencing

The sides keep chickens inside and help block animals approaching from the ground. Choose a material that matches the size and strength of the flock and the predators in your area.

Ground protection

Foxes, dogs, raccoons, and other animals may try to push or dig under a fence. The bottom edge should be buried, pinned, or extended outward as an apron.

A secure gate

A loose gate or wide gap can undermine the rest of the enclosure. Use a gate that closes fully and can be secured at night.

For higher-risk areas, many poultry keepers combine overhead netting with stronger perimeter fencing or an electric poultry fence. The best setup depends on your flock, enclosure size, terrain, and local wildlife.

HOW TO CHOOSE POULTRY NETTING FOR COOPS

Start by considering how the netting will be used. A small backyard run may need a different solution than a large pasture enclosure.

Check the material

UV-resistant polyethylene is a practical choice for outdoor poultry netting. It is lightweight, resistant to rust, and easier to handle than many metal options. UV resistance helps the netting stand up to regular sun exposure.

Select an appropriate mesh opening

Mesh size should be small enough to prevent chickens from escaping and to reduce access for smaller animals. If you keep chicks, bantams, or other small birds, choose a smaller opening than you might use for mature hens.

The mesh should also be easy to see and inspect. Avoid using damaged netting or material with stretched openings.

Match the netting to the installation

Light-duty poultry netting may be suitable for low-risk backyard applications, temporary pens, or larger covered areas where the net is supported properly. Heavy-duty poultry fencing is a better choice when the enclosure will face more animal pressure or regular use.

Product construction, edge strength, support spacing, and local conditions all affect performance. US Netting’s poultry netting guide provides an overview of light-duty and heavy-duty poultry fencing options.

HOW TO INSTALL CHICKEN COOP NETTING

Good installation is as important as the netting itself. A strong material can still fail if it is loose, poorly supported, or left open at the edges.

1. Measure the run

Measure the length and width of the area you want to cover. Include enough material to reach the outside of the support posts or frame.

For larger runs, plan where the net will meet, overlap, and attach. Avoid relying on a single unsupported span if the area is wide.

2. Set strong corner posts

Corner posts carry much of the tension. Use sturdy wood, metal, or suitable fencing posts. Set them firmly into the ground and make sure they remain stable before attaching the netting.

Intermediate posts or overhead support lines may be needed for wide runs. Without enough support, the net can sag and collect leaves, snow, or rainwater.

3. Build a support structure

Attach hooks, clips, cable, or other support points near the tops of the posts. For larger enclosures, support cables can help carry the weight of the netting across the span.

The goal is a roof that remains above the chickens’ reach and does not form deep pockets where birds could become caught.

4. Drape the netting over the run

Position the netting so it covers the full enclosure. Pull it evenly across the support structure. Avoid sharp folds, loose corners, and areas where the net can rub against rough wood or metal.

Keep the net taut without overstretching it. Excessive tension can place unnecessary strain on the mesh and fasteners.

Hands securing poultry netting to a wooden chicken run post

5. Secure the edges

Attach the netting to the posts, frame, or perimeter fencing with suitable clips, staples, rings, or UV-resistant ties. Secure all corners first, then work along the edges.

Pay close attention to:

  • The corners of the run
  • The area above the gate
  • Seams between pieces of netting
  • Gaps around the coop
  • Places where the net meets side fencing

If two pieces meet, overlap them and fasten the seam closely. A narrow gap may be enough for a bird to escape or a predator to enter.

6. Protect the bottom of the enclosure

Overhead netting protects against aerial predators, but ground predators require a protected perimeter.

Depending on your site, you can:

  • Bury the lower edge of the side fencing
  • Extend the fencing outward to create a ground apron
  • Pin the bottom edge tightly to the soil
  • Add hardware cloth around the lower section
  • Fill gaps near gates, corners, and uneven ground

Walk the entire perimeter after installation. Look for spaces where an animal could push under or squeeze through.

COMMON MISTAKES TO AVOID

Leaving the run open at the top

A side fence does not protect chickens from hawks. If aerial predators are a concern, cover the entire run with suitable netting.

Allowing the roof to sag

Sagging netting may create weak points and can collect debris or snow. Add support lines or posts when needed, and retension the net after severe weather.

Using too few fasteners

Fasten the netting along the full edge rather than attaching it only at the corners. Loose sections can lift in wind or separate from the frame.

Ignoring the gate

Check the gate every time you inspect the run. Make sure it closes completely and that the surrounding netting and fencing do not leave a gap.

Choosing netting without considering young birds

Small chicks may pass through openings that contain adult hens. Choose mesh based on the smallest bird in your flock.

INSPECT AND MAINTAIN THE NETTING

Inspect your chicken coop netting regularly, especially after strong wind, heavy rain, ice, or snow. Look for:

  • Torn or stretched mesh
  • Loose ties, staples, or clips
  • Sagging sections
  • Open seams
  • Fallen branches
  • Gaps along the ground
  • Damage around gates and corners

Repair small problems promptly. A patch secured over a damaged area may help restore coverage, but larger or weakened sections should be replaced.

Keep nearby branches trimmed so they do not fall onto the net or provide predators with a way to reach the enclosure. Remove leaves and debris from the roof before they add weight to the mesh.

A completed chicken run with overhead poultry netting and secure perimeter fencing

CREATE A SAFER RUN FOR YOUR FLOCK

Chicken coop netting is a practical way to add overhead protection without building a solid roof over the entire run. When combined with secure side fencing, a protected ground edge, and a reliable gate, it helps create a safer space for backyard chickens and other poultry.

American Nettings & Fabric, Inc. supplies netting and fencing solutions for agricultural, garden, and poultry applications. With more than 40 years of family-owned experience, our team can help you review your enclosure size, predator concerns, and installation needs.

Explore agricultural netting solutions

Shop available products

Learn more about American Nettings & Fabric

Deer Netting Installation: How High and How to Set It Up

Deer netting can protect vegetable gardens, orchards, nurseries, berry patches, and landscape plants without the weight or sharp edges of traditional wire fencing. The key is installing the fence at the right height and closing the gaps where deer may try to go around or underneath it.

For most gardens and growing areas, the finished fence should be 7½ to 8 feet high. A 6-foot fence may work around a small, enclosed garden, but deer can clear that height when they have enough space and motivation.

This guide explains how high a deer fence should be, how to plan the fence line, and how to install deer netting for dependable protection.

HOW HIGH SHOULD DEER FENCE BE?

The right height depends on the size of the protected area, local deer pressure, and the layout of the property.

Application Recommended finished height
Small, tightly enclosed garden 6 feet may be suitable
Typical home garden 7½–8 feet
Orchard, vineyard, nursery, or large garden 8 feet minimum
High deer pressure or open property 8–10 feet
Individual shrubs or young trees 4–6 feet for partial protection

An 8-foot deer fence is the most practical choice for reliable exclusion around most gardens and growing areas. It creates a visual barrier that deer are less likely to attempt.

A 6-foot fence can be effective in a small enclosure where deer cannot see a clear landing area. It is less dependable around open spaces, long fence lines, or areas with frequent deer activity.

Height alone is not enough. The fence should also:

  • Reach tightly to the ground
  • Have secure corners and end posts
  • Follow the shape of the land
  • Include a properly fitted gate
  • Avoid loose sections and large openings

For additional background, the Oregon Department of Fish and Wildlife deer fencing guide and North Carolina Wildlife Resources Commission fencing guidance both emphasize fence height and careful installation as important parts of deer exclusion.

CHOOSE THE RIGHT DEER NETTING

The best material depends on the size of the area and the level of protection required.

American Nettings & Fabric offers several deer protection options:

Lightweight deer netting is easy to handle and works well for seasonal protection or smaller growing areas. A heavier deer fence is a better choice for large perimeters, long-term use, or places where deer may push against the mesh.

When selecting a product, consider:

  • Finished fence height
  • Total fence length
  • Mesh size
  • Expected deer pressure
  • Wind exposure
  • Gate and equipment access
  • Whether the fence will be installed seasonally or permanently

A product specialist can help match the netting and support system to your application.

PLAN THE FENCE LINE FIRST

Good preparation makes deer netting installation faster and more secure.

Walk the area and mark:

  • All corners
  • Changes in direction
  • Gate locations
  • High and low points
  • Existing trees, buildings, or posts
  • Known deer trails
  • Areas where water may collect

Use stakes and string to outline the fence line before installing permanent supports. This helps you check the layout and estimate the amount of netting, posts, ties, and ground stakes required.

Keep the fence line as straight and simple as possible. Each corner creates another point that needs to be supported and tensioned. A simple layout usually provides a stronger and easier-to-maintain barrier.

Clear brush, branches, rocks, and tall weeds from the installation area. Vegetation can snag the mesh, create gaps, and make inspection more difficult later.

INSTALL STRONG CORNERS AND END POSTS

Corner and end posts carry more strain than line posts. Set them firmly and check that they remain plumb.

For a typical netting installation:

  1. Set the corner posts first.
  2. Install end posts at gates and fence terminations.
  3. Add braces where the fence changes direction or where the run is long.
  4. Check the height from the ground before attaching the netting.

Posts should be tall enough to support the desired finished height while leaving enough length to secure them in the ground. The posts must also account for uneven terrain. A post that looks tall enough at one point may leave the fence too low at a nearby high spot.

For standard deer and poultry fencing, American Nettings & Fabric recommends posts with a minimum diameter of approximately 1½ inches and spacing of about 10–12 feet. Closer spacing may be useful in windy areas, on uneven ground, or where the netting needs additional support.

ADD LINE POSTS AND TOP SUPPORT

Install line posts between the corners at regular intervals. The correct spacing depends on the netting, the terrain, and local wind conditions.

Closer post spacing helps:

  • Reduce sagging
  • Keep the top edge at the correct height
  • Support gates and corners
  • Limit movement in wind
  • Maintain a clean appearance

A top cable or tension wire can provide additional support on long runs. It helps carry the weight of the netting and keeps the top edge from dropping between posts.

Attach the top support securely to the corner and end posts. Do not rely on loose ties or weak temporary supports for a permanent installation.

Deer netting installed around a garden with evenly spaced support posts

ATTACH THE NETTING

Unroll the deer netting along the outside of the posts. Keep the material supported as you work so it does not drag across rough soil, branches, or sharp objects.

Begin at a corner or end post:

  1. Align the top of the netting with the planned finished height.
  2. Secure the mesh to the first corner post.
  3. Pull the netting moderately taut toward the next post.
  4. Attach the mesh with suitable ties, clips, or fasteners.
  5. Continue along the fence line.
  6. Return to check corners, joins, and low areas.

The netting should be snug but not drum tight. Excessive tension can place unnecessary strain on the mesh, fasteners, and posts. A small amount of flexibility allows the fence to move with wind and normal outdoor conditions.

Keep the upper edge consistent. A low section at the top can create a weak point, especially on sloped ground.

Avoid leaving folds or loose pockets near the bottom. These can collect leaves and branches, and they may allow the mesh to lift away from the soil.

SECURE THE BOTTOM EDGE

A deer fence can fail even when it is tall enough if deer can push underneath it.

The bottom edge should remain close to the ground along the entire fence line. On level soil, pin the mesh down with ground stakes. On uneven ground, overlap or flare the lower edge outward to close low spots.

A practical option is a 6-inch outward-facing apron. Lay the extra mesh flat on the ground on the outside of the protected area and secure it with stakes. This makes it more difficult for deer to push the fence inward or find a gap.

You can also:

  • Bury a few inches of the bottom edge
  • Add soil to low areas
  • Use extra stakes around dips and corners
  • Overlap netting at joins
  • Check the ground after heavy rain

The mesh should not be left suspended several inches above the soil. Walk the full perimeter after installation and inspect the fence from both sides.

Close-up of deer netting flared outward and pinned securely to the ground

INSTALL THE GATE AT THE SAME HEIGHT

The gate is often the weakest part of a deer fence. It should match the height of the surrounding netting and leave minimal space along the bottom.

For a garden gate:

  • Use a rigid frame that will not sag
  • Cover the frame with suitable deer netting
  • Match the gate height to the fence
  • Keep the bottom edge close to the ground
  • Use secure hinges and a reliable latch
  • Check that the gate closes fully

Plan gate width around your normal access needs. A narrow pedestrian gate may be enough for a home garden. Larger gardens, orchards, and nurseries may need equipment access.

Do not leave the gate several inches lower than the rest of the fence. A difference in height can create an easy entry point.

INSTALLING DEER NETTING ON SLOPES

Sloping ground requires extra attention. Measure the finished height from the ground directly beneath each part of the netting, not from a single reference point.

On a slope:

  • Place posts at changes in elevation
  • Keep the lower edge close to the soil
  • Add height where the inside ground rises near the fence
  • Secure low points with additional stakes
  • Avoid large triangular gaps between posts

If the protected side of the fence is higher than the outside approach, deer may have an easier jump. In these areas, use the higher end of the recommended range or increase the fence height where needed.

CHECK THE FENCE AFTER INSTALLATION

Inspect the completed deer netting installation before relying on it to protect plants or crops.

Use this checklist:

  • Fence height is at least 7½–8 feet where full exclusion is needed
  • Corners and end posts are stable
  • Line posts are evenly spaced
  • The top edge is supported and level
  • Netting is secure but not over-tightened
  • The bottom edge reaches the ground
  • Low spots are pinned, buried, or backfilled
  • The gate matches the fence height
  • No branches or sharp objects are pressing against the mesh
  • All joins and corners are securely fastened

Inspect the fence regularly, especially after strong wind, heavy rain, falling branches, or equipment work near the perimeter. Repair small gaps before they become larger problems.

A PRACTICAL HEIGHT FOR MOST INSTALLATIONS

For most home gardens, orchards, nurseries, and crop areas, install deer netting to a finished height of 7½ to 8 feet. Use a secure support system, keep the lower edge tight to the ground, and give extra attention to gates, corners, slopes, and low spots.

A 6-foot fence may suit a small, enclosed garden, but it should not be treated as a universal deer-proof height. Where deer pressure is high or the protected area is open, choose an 8-foot or taller design.

Explore deer fencing and netting solutions from American Nettings & Fabric and choose the material, size, and support system that fits your growing area.

Sources

Shade Cloth for Patios: A Cooler, More Private Outdoor Space

Your patio should be a comfortable place to sit, dine, garden, and spend time outdoors. Strong sun and nearby sightlines can make that difficult. Shade cloth for patio areas offers a practical way to reduce direct sunlight while adding useful patio privacy.

Unlike a solid roof or wall, breathable shade cloth can filter sunlight and maintain airflow. Used overhead, along a pergola, or as a vertical screen, it helps turn an exposed patio into a more comfortable outdoor living space.

American Nettings & Fabric, Inc. supplies shade cloth solutions for home gardens, landscaping, and outdoor spaces. Explore American Knit Shade Cloth or browse the shade product category to find a suitable starting point.

Why Use Shade Cloth for a Patio?

Patio shade cloth can provide several benefits in one simple material:

  • Reduces direct sun and glare
  • Helps make outdoor seating areas feel cooler
  • Filters ultraviolet exposure
  • Adds daytime privacy
  • Allows air to move through the fabric
  • Protects patio furniture and outdoor surfaces from constant sun
  • Creates a softer, more finished look for pergolas and frames
  • Offers a flexible alternative to permanent construction

Shade cloth does not need to cover every part of the patio to make a difference. An overhead panel can block high sun, while a vertical panel can address afternoon glare or views from a neighboring property.

Create a Cooler Outdoor Living Space

Direct sun can quickly heat patio decking, furniture, walls, and other surfaces. Shade cloth reduces the amount of sunlight reaching these areas. The result is a more comfortable space for meals, conversation, container gardening, or quiet time outside.

Breathable knitted fabric also allows air to pass through. This matters on warm days when a solid cover may make the space feel closed in or hold warm air beneath it.

Overhead shade for midday sun

An overhead panel works well when your main concern is high sun during the middle of the day. It can be attached to:

  • A pergola
  • A freestanding frame
  • Posts installed near the patio
  • An existing garden structure
  • A covered seating area with suitable support points

Position the fabric so it covers the seating or dining area without creating unnecessary excess. A small amount of slope can help prevent water from collecting on the material if rain passes through or settles after a storm.

Side shade for low-angle sun

Morning and afternoon sun often enters from the side. A vertical shade cloth panel can help block glare while also improving patio privacy.

This layout is especially useful for patios that face:

  • A street
  • A shared property line
  • A neighboring home
  • An open driveway
  • A busy garden or walkway

A side panel can be installed on one side of the patio rather than enclosing the full space. This keeps the area open and breathable while addressing the direction that creates the most discomfort.

A vertical dark green knitted shade cloth panel provides patio privacy beside a wood pergola

Add Patio Privacy Without Closing In the Space

Patio privacy does not always require a fence, wall, or permanent screen. Shade cloth can soften direct views while still allowing filtered light and airflow.

The level of privacy depends on the fabric, color, installation angle, and lighting. A darker or denser fabric generally provides more visual screening than a light, open fabric. For many patios, a side panel at eye level is enough to create a more private feel.

Use shade cloth to screen:

  • Seating areas
  • Outdoor dining tables
  • Hot tubs and lounging spaces
  • Balcony edges
  • Garden work areas
  • Poultry or pet areas near the home
  • Patio doors and windows exposed to low-angle sun

Keep in mind that many shade cloth installations provide the strongest privacy during the day. At night, interior or patio lighting can make the space more visible from outside. If nighttime privacy is important, consider a denser screen or combine shade cloth with curtains, a trellis, or plantings.

Choose the Right Patio Shade Cloth

Before purchasing fabric, consider how you want to use the space. The best choice depends on your sun exposure, privacy needs, support structure, and preferred appearance.

Start with the main goal

Choose your fabric based on the result you want:

For general cooling:
Use an overhead panel positioned above the main seating or dining area.

For patio privacy:
Use a vertical panel along the side facing neighbors, streets, or open areas.

For afternoon sun:
Place the fabric on the west-facing side or use a combination of overhead and vertical coverage.

For a more open feel:
Choose a lighter arrangement that filters sun without blocking too much of the surrounding view.

For stronger screening:
Select a darker or denser shade cloth and install it where direct sightlines are most noticeable.

American Nettings & Fabric offers products in a range of sizes for home and commercial applications. If you are unsure which fabric or layout fits your patio, contact the team through the company website for practical product guidance.

Plan the Installation Before You Attach the Fabric

A good installation begins with a simple site check. Spend time on the patio during different parts of the day and note where the sun and outside views affect comfort.

Check the sun

Observe the patio in the morning, at midday, and in the late afternoon. Strong sunlight may come from a different direction at each time. Mark the areas where:

  • Furniture becomes too hot
  • Glare makes it hard to sit comfortably
  • Plants wilt or dry quickly
  • Sun enters through nearby doors or windows
  • Low-angle light reaches the patio

This will help you decide whether you need overhead shade, side shade, or both.

Check your support points

Shade cloth should be attached to sturdy supports. Suitable options may include pergola beams, structural posts, walls, or a properly built freestanding frame.

Before installation, confirm that:

  • Anchor points are secure
  • The structure can handle the expected load
  • The fabric will not rub against sharp edges
  • The layout allows even tension
  • Hardware is suitable for outdoor use

Avoid attaching large panels to weak trim, loose fencing, or decorative elements that are not designed to carry tension.

Close-up of breathable knitted shade cloth being fastened to a sturdy pergola beam

Allow for airflow

Shade cloth is designed to filter sunlight while allowing air to move through the knit. Do not seal every side of the patio with solid material unless the structure and local conditions are designed for it.

Open edges can help reduce wind pressure and maintain a comfortable outdoor feel. Side panels should be installed with the local weather in mind, especially in locations that receive strong seasonal winds.

Combine Shade Cloth With Greenery

Shade cloth and plants work well together in patio designs. A vertical panel can provide immediate screening while vines, potted plants, or a trellis add a natural layer over time.

Consider pairing patio shade cloth with:

  • Climbing vines
  • Tall ornamental grasses
  • Container shrubs
  • Raised planters
  • A garden trellis
  • Hanging baskets
  • Decorative pots

This combination can create a softer boundary without building a solid wall. Decorative plant pots can also help define the patio edge and organize container plants beneath the shade.

A shaded patio with knitted canopy fabric, outdoor furniture, potted herbs, and natural garden textures

Care and Seasonal Use

Shade cloth is a practical option for seasonal patio improvements. Depending on your climate and installation, you may choose to leave it in place during the warmer months and remove it before severe winter weather.

Inspect the fabric regularly for:

  • Frayed edges
  • Loose attachment points
  • Excessive sagging
  • Rubbing against hardware or supports
  • Dirt, leaves, or plant growth
  • Damage after high winds

Keep the fabric clean according to the product’s care instructions. Allow it to dry before storage, and store it in a dry location when it is not in use.

Shade cloth is not usually a fully waterproof roofing material. If rain protection is a priority, plan the patio with drainage, slope, and a suitable roof system in mind. Shade cloth works best when the main goals are cooling, filtered light, airflow, and patio privacy.

Make Your Patio More Comfortable

The right shade cloth can make an exposed patio easier to use throughout the day. Use an overhead panel for direct sun, a vertical panel for privacy, or a combination of both for a more complete outdoor living solution.

Start by identifying the sunniest and most visible parts of your patio. Then choose a suitable fabric, plan secure supports, and install the material with balanced tension and airflow in mind.

Create a cooler, more private patio. Shop shade cloth solutions from American Nettings & Fabric.

What Size Mesh Do You Need for Bird Netting? A Quick Guide

Choosing the right mesh size helps you protect fruit, vegetables, and garden plants without using more netting than necessary.

The best choice depends on three factors:

  • The smallest bird you need to exclude
  • The crop or area you want to protect
  • Whether the netting will be installed above the crop or directly over the plants

For many gardens, orchards, vineyards, and berry fields, 3/4-inch bird netting is a practical all-purpose choice. Smaller mesh may be better when sparrows, finches, or other small birds are the main concern.

What Does Bird Netting Mesh Size Mean?

Mesh size refers to the approximate size of each opening in the netting. It does not describe the overall length or width of the net.

For example, a net with a 3/4-inch mesh has openings that measure about 3/4 inch across. The total net size may be 15 feet by 15 feet, 7.5 feet by 21 feet, or another dimension.

Common mesh sizes include:

Mesh size Approximate opening Typical use
1/4 inch 6 mm Very small birds and close plant protection
1/2 inch 12–13 mm Sparrows, finches, and other small birds
3/4 inch 19 mm General crop and garden protection
1 inch 25 mm Larger garden areas and general bird control
1.5–2 inches 38–50 mm Large birds and some open structures

The key rule is simple: choose mesh based on the smallest bird you need to keep out.

A large mesh may stop crows but still allow sparrows to enter. A smaller mesh can provide broader protection, but it may cost more and can be heavier to install.

Is 3/4-Inch Mesh the Best All-Purpose Option?

For many crop protection applications, yes. A 3/4-inch square mesh is widely used for berries, fruit trees, vines, gardens, and small orchards.

American Nettings’ standard Knitted Bird Netting uses a 3/4-inch square mesh. It is made from green, UV-stabilized, Raschel-knitted HDPE. The green color blends into many garden and agricultural settings, while the knitted construction creates a flexible net that is easy to handle.

This size is commonly selected for protection from birds such as:

  • Blackbirds
  • Starlings
  • Thrushes
  • Pigeons
  • Doves
  • Many larger garden birds

A 3/4-inch mesh can also allow useful air movement and light to reach the crop. In some applications, it may allow larger pollinators to pass through. However, netting should be installed with care around flowering crops and checked regularly for gaps or loose sections.

Ripe cherries protected by green bird netting

What Size Mesh Do You Need for Small Birds?

If sparrows, finches, chickadees, or other small birds are causing most of the damage, consider a mesh size of 1/2 inch or smaller.

Small birds can sometimes pass through larger openings. They may also reach berries through the net if the netting is draped directly against the foliage.

A smaller mesh can be useful for:

  • Blueberry bushes
  • Strawberries
  • Currants and other small fruit
  • Vegetable gardens
  • Seed beds
  • Young plants with exposed fruit

A 1/4-inch mesh provides even smaller openings. It may be suitable where small birds are the main pest, but it can be less convenient to handle over large areas. Fine netting may also restrict access for pollinators, so timing and installation matter.

For commercial growers, the best choice should account for the most common bird species on the property. If bird pressure varies by field or season, different mesh sizes may be appropriate for different areas.

What Size Mesh Works for Blueberries and Berry Crops?

For blueberry bushes and other berry crops, 3/4-inch mesh is a common overhead choice. It works well when the netting is installed over a support structure and the crop is protected from above.

Use a smaller mesh when:

  • Small birds are entering through the openings
  • The net is placed close to the bushes
  • Birds are reaching fruit through the netting
  • The crop is grown in a small garden area where closer coverage is practical

The net should not rest directly on the fruit. Birds can land on loose netting and still reach berries through the openings. Instead, use hoops, posts, or another support system to hold the net above the plants.

The American Nettings blueberry netting guide provides additional information for protecting berry bushes during the growing season.

What Size Mesh Is Right for Orchards and Vineyards?

For orchards and vineyards with mixed bird activity, 3/4-inch mesh is often a suitable starting point.

It can be used over:

  • Cherry trees
  • Apple and pear trees
  • Grape vines
  • Small fruit trees
  • Commercial berry rows
  • Garden trellises

For vineyards, netting may be installed as a row cover or draped over individual vines. The net should be secured at the ends and along the bottom edge so birds cannot enter underneath.

For orchards, measure the full area that needs protection. Leave enough material to cover the sides and secure the edges. A net that only covers the top of a tree may leave fruit exposed along the sides.

If the main problem is small birds, choose a smaller mesh where available. If the main problem is larger birds such as crows, a 3/4-inch mesh may still be useful because it provides more complete protection against mixed bird populations.

Should You Use Larger Mesh for Crows and Gulls?

Larger birds can often be excluded with 1.5- to 2-inch mesh. This type of netting may be suitable for large structures, open areas, or applications where small birds are not a concern.

However, larger mesh is not always the best choice for crops. Sparrows and other small birds may pass through it. For gardens, orchards, vineyards, and berry fields with mixed bird activity, 3/4-inch or 1-inch mesh usually offers more complete coverage.

Use larger mesh only when you understand which birds are causing the damage and confirm that smaller birds are not likely to enter.

Bird netting panel supported above a fruit crop with birds outside the protected area

Choose the Right Mesh for the Crop

Berry bushes

Choose 3/4-inch mesh for overhead protection from common garden birds. Consider 1/2-inch or smaller mesh where small birds are a serious problem.

Fruit trees

Use 3/4-inch mesh for cherries, apples, pears, and other tree fruit. Install it over a frame or support system instead of laying it directly on the branches.

Grapes and vineyards

A 3/4-inch mesh can protect grape rows and individual vines. Secure the lower edge carefully, especially where the row meets the ground.

Vegetable gardens

A 3/4-inch mesh can help protect ripening vegetables and garden plants from larger birds. Use smaller mesh for seedlings or areas affected by small birds.

Poultry areas

Bird netting can help cover open sections of poultry runs and discourage wild bird access from above. It is not a replacement for suitable poultry fencing around the sides or base of the enclosure.

Installation Matters as Much as Mesh Size

Even the correct mesh size will not work well if the net is loose, damaged, or poorly secured.

Follow these basic installation practices:

  1. Keep the netting taut. Loose netting can sag onto plants and create areas where birds may become caught.
  2. Keep it above the crop. Use hoops, posts, or a simple frame to prevent birds from reaching fruit through the mesh.
  3. Secure all edges. Close gaps at the ground, along row ends, and around support posts.
  4. Inspect the net regularly. Repair tears before birds find and enlarge them.
  5. Avoid leaving loose netting on the ground. Store unused material safely when it is not covering a crop.
  6. Use suitable clips and fasteners. Netting clips can help hold the net in place without creating large openings.

Wildlife safety should always be considered. A properly supported and secured net is safer than a loose net that drapes across foliage or gathers on the ground. Check your local wildlife guidance for additional requirements.

Top-down view of green knitted netting, measuring tape, clips, and garden tools

A Quick Mesh-Size Guide

Use this simple guide when selecting bird netting:

  • Small birds, such as sparrows and finches: 1/2 inch or smaller
  • Mixed garden birds: 3/4 inch
  • Blackbirds, starlings, pigeons, and doves: 3/4 inch to 1 inch
  • Large birds only, such as crows and gulls: 1.5 to 2 inches may be suitable
  • Berry bushes and fruit trees: 3/4 inch is a common starting point
  • Netting installed directly on plants: Consider a smaller mesh and use extra care with support and tension

Find the Right Bird Netting for Your Application

The right answer to “what size mesh for bird netting?” starts with the smallest bird you need to exclude. For most mixed crop and garden applications, 3/4-inch mesh offers a practical balance of coverage, airflow, visibility, and ease of use.

For small birds, choose a tighter mesh where available. For larger birds and open structures, larger mesh may be suitable when smaller species are not a concern.

Explore American Nettings’ bird netting or review the company’s guide to protecting crops from pest birds. For crop areas that also need protection from hail, see Anti-Hail Bird Netting.

Tree Netting for Birds: How to Cover a Tree the Right Way

Birds can quickly reduce a fruit harvest, especially as cherries, berries, peaches, and other crops begin to ripen. Tree netting for birds creates a physical barrier that helps protect fruit without relying on sprays or scare devices.

The key is installing the netting correctly. Loose netting can trap birds and other wildlife. Netting that is pulled tight over a stable frame offers better protection and creates a safer setup.

This guide explains how to put netting on a tree, which materials to choose, and how to check the installation throughout the season.

Choose the Right Bird Netting

Before covering a tree, select netting that is suitable for the crop, tree size, and local wildlife.

Look for:

  • Durable knitted or woven construction
  • Small, consistent mesh openings
  • A visible color that wildlife can see
  • Enough width and length to cover the full tree
  • Material that can be pulled taut without stretching out of shape

Small-aperture netting is generally safer than large mesh. Wildlife organizations commonly recommend mesh openings of approximately 5 mm by 5 mm or smaller when fully stretched. Requirements can vary by location, so check local wildlife guidance before installing netting.

Avoid thin, loose monofilament netting when possible. If this type of netting is used, it should be installed tightly over a sturdy frame. It should not be thrown loosely over the branches.

For additional crop protection ideas, see our guide to bird netting for crops.

Ripe cherries protected by green knitted bird netting

Cover the Tree After Fruit Has Set

Tree netting is usually installed after flowering and pollination are complete. Covering too early may limit access for bees and other pollinators.

A practical schedule is:

  1. Allow the tree to flower.
  2. Wait until fruit has formed.
  3. Install the netting before fruit begins to color and ripen.
  4. Remove the netting after harvest or when protection is no longer needed.

If a tree has already been netted, remove the material before flowering begins again. Store it in a dry place and check for tears before using it next season.

The Safest Method: Build a Frame

The best way to cover a tree is to keep the netting off the foliage. A frame provides space between the branches and the mesh. It also makes it easier to pull the netting tight and secure the edges.

A frame can be made from:

  • PVC pipe
  • Poly pipe
  • Timber
  • Garden stakes
  • Star pickets
  • Crossed poles or arches

The frame should be tall and wide enough to sit clear of the outer branches. Leave enough room for the tree to grow naturally without pressing against the netting.

A small fruit tree covered with taut netting over a simple PVC support frame

How to Put Netting on a Tree

1. Measure the Tree

Measure the tree’s height, width, and canopy spread. Add extra material for the sides and base.

Do not measure only the visible foliage. The netting must extend far enough to reach the ground or wrap securely around the trunk.

Allow additional netting for:

  • Overlapping sections
  • An access flap
  • Ground fastening
  • Uneven branches
  • Future growth

A piece that is too small will leave gaps. A piece that is much too large may be difficult to tension properly.

2. Install the Stakes

Place stakes evenly around the tree. Set them far enough away from the canopy to allow the frame and netting to remain clear of the branches.

For a small tree, three or four stakes may be enough. Larger trees may require more supports to prevent the frame from bending or collapsing.

Check that each stake is firmly anchored. The frame may catch wind, so it needs a stable base.

3. Build the Frame

Connect the stakes with PVC pipe, timber, or another suitable support material. A dome, box, or crossed-arch shape can work well.

The frame should:

  • Remain stable in normal wind
  • Support the netting above the foliage
  • Leave room for fruit development
  • Avoid sharp edges that could damage the mesh
  • Provide a clear access point for harvesting

Secure joints with connectors, wire, or outdoor-rated ties. Check the frame before adding the netting.

4. Pull the Netting Over the Frame

Drape the netting over the frame rather than directly over the tree. Pull it evenly from each side.

The finished netting should be smooth and taut. Avoid:

  • Sagging sections
  • Deep folds
  • Loose pockets
  • Open corners
  • Areas resting heavily on branches

Taut netting is less likely to catch feet, wings, or fur. It also prevents birds from reaching fruit through the mesh.

Do not stretch the netting so tightly that it tears or pulls the frame out of position. Use steady tension across the entire structure.

5. Secure the Bottom Edge

Wildlife can enter through surprisingly small openings at the base. Secure the lower edge all the way around the tree.

Suitable options include:

  • Tent pegs
  • Landscape staples
  • Ground stakes
  • Smooth boards
  • Bricks wrapped so they cannot damage the netting
  • Clips or ties attached to the frame

If the netting meets at the trunk, close the opening carefully. The base should have no gaps large enough for birds or small animals to enter.

A close-up of bird netting secured smoothly around a tree trunk with a ground peg

6. Add a Secure Access Flap

You will need access for harvesting, pruning, watering, and inspection. Plan the opening before the netting is fully secured.

An access flap can be made with:

  • Overlapping netting
  • Outdoor clips
  • Hook-and-loop fasteners
  • Garden ties
  • A simple opening along one frame side

Close the flap tightly after every visit. Do not leave an open side overnight.

If two sections of netting meet, overlap them and fasten the seam. Loose overlaps can create entry points and may sag over time.

Inspect the Installation Regularly

Tree netting for birds is not a “set and forget” solution. Inspect the enclosure regularly while it is in use.

Check for:

  • Tears or damaged mesh
  • Loose clips
  • Sagging areas
  • Gaps near the ground
  • Openings around the trunk
  • Branches pushing against the netting
  • Animals attempting to enter
  • Fruit or leaves weighing down the material

Daily checks are recommended when fruit is ripening or wildlife activity is high. Wind, rain, and growing branches can change the tension of the installation.

Hands inspecting taut bird netting and checking the space between the mesh and fruit tree branches

What to Do If Wildlife Becomes Entangled

If you find a bird, bat, or other animal caught in netting, do not pull it free by hand. Struggling animals can suffer additional injuries, and some species may pose health risks.

Instead:

  1. Keep people and pets away from the area.
  2. Do not cut around the animal unless directed by a trained wildlife professional.
  3. Contact a local wildlife rehabilitator, animal control office, or wildlife rescue organization.
  4. Follow local instructions for safe assistance.

Prompt action matters. Regular inspection helps identify problems before an animal has been trapped for an extended period.

Common Tree Netting Mistakes

Avoid these installation problems:

Throwing Netting Loosely Over the Tree

Loose, draped netting can form pockets around branches. It may also become difficult to see against dense foliage.

Using Mesh That Is Too Large

Large openings may allow birds to enter but not leave easily. They can also allow wildlife to reach fruit through the barrier.

Leaving the Base Open

An unsealed base is one of the most common failure points. Secure the full perimeter, including the area around the trunk.

Letting the Net Rest on the Foliage

Branches can push against the mesh and create openings. A frame gives the netting proper support and keeps it clear of the fruit.

Leaving Netting Up All Year

Remove seasonal netting after harvest or when protection is no longer necessary. Store it clean and dry, then inspect it before reuse.

Protect More Than One Type of Crop

The same planning principles apply to orchard trees, berry bushes, and vineyard rows. The support structure may change, but the goals remain the same: use suitable mesh, keep it taut, close all openings, and inspect it regularly.

You can also explore our guides to blueberry netting and vineyard netting for crop-specific installation ideas.

American Nettings & Fabric, Inc. supplies netting for commercial growers, orchards, vineyards, gardens, and home landscapes. We offer a range of sizes, from retail packages to commercial rolls, to help you choose a practical solution for your setup.

Cover Your Tree With Confidence

The right tree netting can protect your harvest while supporting safer wildlife management. Use small-aperture netting, install it over a stable frame, keep it taut, seal the base, and check it often.

Choose suitable netting. Build a secure frame. Protect your fruit.

Cucumber Trellis Netting: Grow More Cucumbers in Less Space

Cucumber plants are productive, but their long vines can quickly take over a garden bed. Growing cucumbers vertically with cucumber trellis netting gives those vines the support they need while keeping fruit off the ground.

A vertical growing system can help you:

  • Use less bed space
  • Improve airflow around leaves
  • Keep cucumbers cleaner
  • Make fruit easier to find and harvest
  • Create a more organized garden row

With sturdy supports, properly installed netting, and a little early training, you can build a simple cucumber trellis that works for both home gardens and larger growing areas.

Why Grow Cucumbers Vertically?

Cucumbers naturally produce long, spreading vines. Left on the ground, those vines can cross paths, cover nearby plants, and make harvesting more difficult.

Trellis netting changes the way the plant grows. Instead of spreading across the soil, the main vine climbs upward and produces foliage and fruit along a supported vertical surface.

The main benefits include:

More usable garden space
A vertical row takes up less ground area than sprawling cucumber vines. This leaves room for herbs, flowers, or additional vegetables.

Cleaner fruit
Cucumbers that hang above the soil are less likely to rest in wet dirt. This can help reduce staining, soft spots, and fruit damage.

Better visibility
Fruit is easier to see among an upright vine. Regular harvesting also becomes simpler because you do not need to search through a dense layer of leaves on the ground.

Improved airflow
A supported plant often has better air movement around the foliage than a crowded ground-running vine. Good spacing and airflow can help create healthier growing conditions.

Trellis netting supporting a productive climbing bean plant in a garden

Choose the Right Cucumber Trellis Netting

The netting should be strong enough to support mature vines and developing fruit. It should also be easy to attach, adjust, and remove at the end of the season.

When selecting cucumber trellis netting, consider:

  • Mesh opening size
  • Netting height and length
  • Material strength
  • Compatibility with your support posts
  • Whether you plan to reuse it
  • How easily you can reach through the mesh

Mesh openings around 4 to 6 inches are practical for many cucumber systems. They provide plenty of places for tendrils to catch while allowing you to reach through and harvest fruit.

Very small mesh can make harvesting more difficult. Very large openings may provide fewer support points, especially for young vines.

American Nettings & Fabric offers netting solutions for gardening and plant support. Visit the gardening products category or browse the broader nettings category to explore available options.

Plan the Trellis Before Planting

Install the trellis before cucumber vines begin to spread. It is much easier to prepare the support system while the soil is clear than to work around long, tangled vines later.

Choose the location

Place the trellis along the edge of a garden bed or beside a single row of cucumbers. Select a spot with suitable sunlight and good access from at least one side.

If you are installing more than one trellis row, leave enough room to walk between them. This makes training, watering, pest checks, and harvesting easier.

Set the posts

Use sturdy wooden stakes, metal T-posts, or another suitable support system.

For many garden setups:

  • Space posts about 3 to 5 feet apart
  • Drive posts at least 12 to 18 inches into firm soil
  • Use a taller support if you want a trellis around 5 to 6 feet high
  • Add extra support for longer rows or windy locations

The growing vines may look light at first. By midsummer, however, the combined weight of leaves, stems, and fruit can place significant pressure on the posts and netting.

Install the Netting Taut

Loose netting can sag as the plants grow. Sagging makes it harder for vines to climb and can allow the crop to pull the entire system forward.

Follow these basic steps:

  1. Measure the row and position the posts.
  2. Drive the posts firmly into the ground.
  3. Unroll the netting along the base of the supports.
  4. Attach one top corner to the first post.
  5. Pull the top edge tight to the next post.
  6. Secure the netting at the top and down the length of each post.
  7. Continue across the row.
  8. Trim excess material after the netting is fully secured.

Use zip ties, netting straps, or other suitable fasteners. Attach the netting at several points on each post instead of relying on one tie at the top and bottom.

The goal is a firm, even climbing surface. Avoid pulling so tightly that the netting or fasteners are under unnecessary strain.

Prepared garden row with cucumber seedlings positioned beneath vertical trellis netting

Plant Cucumbers Along the Base

Plant cucumber seeds or transplants in a single row near the bottom edge of the netting. A common starting point is about 6 to 12 inches in front of the support.

For vertically grown cucumbers, spacing plants around 8 to 12 inches apart is often practical. Always consider the variety, expected vine size, and information provided on the seed packet or plant label.

Do not plant directly against a post or allow the young stem to press tightly into the netting. Give each plant enough room for its base to develop and for you to water the root zone.

Prepare the soil with suitable organic matter and maintain consistent moisture. Cucumbers grow quickly when they receive adequate warmth, water, light, and nutrients.

Train Young Vines Early

Cucumber vines may climb on their own, but young plants often need guidance. Begin training when the vines are approximately 8 to 12 inches tall or when they reach the lower section of the netting.

Gently guide the main stem toward the mesh. You can:

  • Weave the stem through a few openings
  • Wrap tendrils around nearby strands
  • Use soft plant ties
  • Use suitable plant clips
  • Secure the vine below a leaf joint

Do not pull sharply on the stem. Cucumber vines are flexible when young but can break if bent suddenly.

Place ties loosely enough to allow the stem to thicken. Avoid bare wire or tight fasteners that can cut into the plant.

Gardener gently guiding a young cucumber vine through square trellis netting

Keep the Plant Organized as It Grows

Check the trellis regularly during the growing season. A short inspection every few days can prevent small issues from becoming difficult repairs.

Guide new growth toward open sections of the netting. If a vine moves away from the support, redirect it while the stem is still flexible.

Remove damaged leaves and crowded growth near the base when needed. Avoid heavy pruning unless you know the growth habit of the variety you are growing. Cucumbers can produce fruit on side shoots, so the goal is to improve access and airflow without removing productive growth.

Also inspect the structure after strong wind or heavy rain. Retighten loose netting and reinforce leaning posts before the crop becomes heavier.

Harvest Frequently for Continued Production

Once the plants begin producing, check the vines often. Cucumbers can grow quickly, especially during warm weather.

Harvest fruit when it reaches the size and maturity you prefer for the variety. Support the cucumber with one hand and cut or twist the stem with the other. Avoid pulling hard on the fruit because this can damage the vine.

Regular picking helps keep the plant productive. It also prevents oversized cucumbers from becoming hidden behind leaves and putting extra weight on the trellis.

A vertical system makes harvesting more efficient because the fruit hangs in a more visible position. A mesh opening that is large enough for your hand also helps you reach fruit without forcing it through the netting.

Fresh cucumbers hanging vertically from trellis netting during harvest

Common Cucumber Trellis Mistakes

Installing the netting too late

Waiting until vines have already spread can lead to broken stems and tangled growth. Build the support before planting or install it while plants are still small.

Using weak or shallow posts

Posts that lean under crop weight can pull the netting down. Set supports firmly and add intermediate posts for longer rows.

Leaving the netting loose

Slack at the top allows the system to sag. Pull the upper edge taut before securing the lower sections.

Tying vines too tightly

Tight ties can restrict stems as they grow. Use soft materials and leave enough room for natural expansion.

Choosing mesh that is difficult to harvest through

The netting should support the plant without trapping mature fruit. Check the opening size before installing the full row.

Build a Cleaner, More Productive Cucumber Row

Cucumber trellis netting is a practical way to grow vertically, save garden space, and make routine care easier. Start with sturdy supports, install the netting before the vines spread, and guide the plants while they are young.

The right setup can help you maintain a cleaner crop, improve access to your plants, and enjoy a more manageable harvest throughout the season.

For additional practical guidance, see MIgardener’s cucumber trellis guide and explore American Nettings & Fabric’s gardening netting solutions. Choose the netting size and support layout that fit your garden, growing conditions, and crop plans.

What Percentage Shade Cloth Do I Need? A Simple Guide to Choosing Right

Choosing the right shade cloth percentage helps protect plants from intense sunlight without blocking the light they need to grow.

If you are asking, “What percentage shade cloth do I need?”, use these general guidelines:

  • 30%–35% shade: Sun-loving vegetables, flowers, and plants in mild climates
  • 50% shade: Mixed gardens, leafy greens, heat-sensitive crops, and hot summer conditions
  • 65%–70% shade: Tender plants, nurseries, seedlings, and strong sunlight
  • 80% shade: Shade-loving plants and areas that need significant light reduction

The best choice depends on your plants, local climate, season, and how the cloth will be installed.

What Does Shade Cloth Percentage Mean?

The shade percentage tells you approximately how much sunlight the fabric blocks.

  • 35% shade cloth blocks about 35% of sunlight and allows about 65% through.
  • 50% shade cloth blocks about half of the sunlight.
  • 65% shade cloth blocks about 65% of sunlight.
  • 70% shade cloth allows about 30% of sunlight through.
  • 80% shade cloth provides a much deeper level of shade.

A higher percentage does not always mean better protection. Plants still need enough light for healthy leaves, flowering, and fruit production.

The goal is to reduce heat and sun stress while allowing sufficient light and air movement.

Quick Guide: Choose 30%, 50%, or 70%

Shade percentage Best suited for
30%–35% Tomatoes, peppers, beans, cucumbers, flowers, and most sun-loving plants
50% Mixed vegetable gardens, leafy greens, herbs, and hot summer conditions
65%–70% Seedlings, tender plants, nursery areas, and intense sunlight
80% Ferns, orchids, indoor-outdoor shade plants, and deep shade applications

American Nettings & Fabric offers American Knit Shade Cloth in several shade levels, including 35%, 50%, 65%, 70%, and 80% options.

When to Choose 30% or 35% Shade Cloth

Choose a 30%–35% shade cloth when your plants need plenty of direct light but require some relief from heat and harsh afternoon sun.

This range is often suitable for:

  • Tomatoes
  • Peppers
  • Cucumbers
  • Squash
  • Beans
  • Most herbs
  • Sun-loving annual flowers
  • Young plants during short periods of strong heat
  • Gardens in mild or northern climates

A lighter shade cloth can reduce leaf scorch and heat stress without significantly reducing the light available for growth.

Tomatoes and peppers need strong light to produce flowers and fruit. Using a very heavy shade cloth may cause weak growth or lower production. A 35% shade level can provide useful protection while keeping the growing area bright.

Choose 35% shade when:

  • Your growing area receives morning sun and moderate afternoon heat.
  • You grow mostly full-sun crops.
  • Your climate is mild or cool.
  • You want light protection from sunburn and wilting.
  • You need shade cloth for a short summer period.

In very hot regions, 35% may not provide enough relief for leafy greens or newly transplanted crops. In that case, consider moving up to 50%.

When to Choose 50% Shade Cloth

50% shade cloth is a practical middle option for many gardens and growing areas.

It can work well for:

  • Lettuce
  • Spinach
  • Kale
  • Swiss chard
  • Broccoli and other brassicas
  • Cilantro and other leafy herbs
  • Mixed vegetable gardens
  • Nursery plants
  • Transplants
  • Crops grown in hot summer climates

Leafy greens often benefit from additional shade during warm weather. Too much heat can cause lettuce and spinach to bolt, become bitter, or lose quality. A 50% shade cloth can help lower heat stress and extend the useful growing season.

It is also a useful choice when one growing area contains several different types of plants. If you are not able to use separate shade structures, 50% provides a balanced level of protection for a mixed crop area.

Choose 50% shade when:

  • Summers are hot and sunny.
  • Your plants show signs of wilting during the afternoon.
  • Leafy greens are bolting too quickly.
  • You need protection for mixed crops.
  • You are growing plants in containers that dry out quickly.
  • You need temporary protection for newly planted seedlings.

For many home gardeners, 35% and 50% shade cloth are the most useful starting points.

When to Choose 65% or 70% Shade Cloth

Choose 65%–70% shade cloth when plants need stronger protection from direct sunlight.

This level can be suitable for:

  • Seedlings and young transplants
  • Cuttings and propagation areas
  • Tender ornamental plants
  • Nursery stock
  • Ferns and other shade plants
  • Areas with intense summer sun
  • Outdoor pet or livestock shade structures
  • Plants recovering from heat stress

Newly transplanted plants can be vulnerable to sun and heat while their roots become established. A heavier shade cloth can provide short-term protection during this transition. As the plants develop, you may be able to remove the cloth or replace it with a lighter option.

Shade-loving plants also need less direct light than vegetables such as tomatoes or peppers. A 65% or 70% shade cloth can create a more suitable environment without fully blocking natural daylight.

Choose 65%–70% shade when:

  • Your growing area receives intense afternoon sun.
  • You grow shade-loving plants.
  • You are protecting young plants from transplant shock.
  • You manage a nursery or propagation area.
  • You need more heat relief than 35% or 50% cloth can provide.
  • You are creating shade over a dog run, poultry area, or livestock enclosure.

Avoid using heavy shade cloth over full-sun vegetables for an entire season unless the plants are specifically suited to lower light. Too much shade can reduce flowering, fruiting, and overall plant growth.

When to Choose 80% Shade Cloth

An 80% shade cloth is designed for areas that need significant light reduction.

It may be suitable for:

  • Ferns
  • Orchids
  • Certain palms
  • Philodendrons
  • Indoor-outdoor tropical plants
  • Deep-shade ornamental areas
  • Very bright growing environments
  • Temporary protection for highly sensitive plants

Most vegetables do not need 80% shade for normal production. At this level, there may not be enough light for strong flowering or fruit development. Use it for plants that naturally grow under a forest canopy or for short-term protection during extreme conditions.

How Climate Changes Your Shade Cloth Choice

The same plant may need different shade levels in different climates.

Cooler or northern climates

In cooler areas, sunlight may be less intense and the growing season may be shorter. A lighter shade cloth is often the better starting point.

  • Full-sun vegetables: 30%–35%
  • Mixed gardens: 35%–50%
  • Leafy greens during short heat waves: 50%

Using too much shade in a cool climate can limit the light plants need to grow.

Hot or southern climates

In hot regions, plants may need additional protection from afternoon heat, drying winds, and sunscald.

  • Tomatoes and peppers: 35%–50%
  • Leafy greens: 50%–65%
  • Seedlings and tender plants: 50%–70%
  • Shade-loving ornamentals: 65%–80%

The amount of shade needed can also change throughout the season. A lighter cloth may work in spring, while a heavier cloth may be useful during the hottest weeks of summer.

Watch Your Plants After Installation

Your plants will show whether the shade level is working.

Signs that you need more shade

  • Leaves wilt during the afternoon.
  • Leaf edges become brown or scorched.
  • Fruit develops sunburn.
  • Plants stop growing during hot weather.
  • Lettuce, spinach, or herbs bolt quickly.
  • Container plants dry out very fast.

If you notice these signs, move from 35% to 50% shade, or from 50% to 65% shade.

Signs that you have too much shade

  • Plants become tall and weak.
  • Stems stretch toward available light.
  • Flowering decreases.
  • Fruit production slows.
  • Leaves remain pale.
  • Soil stays wet for too long.

If these signs appear, use a lighter shade cloth, increase ventilation, or limit shading to the hottest part of the day.

Consider the Material and Installation

Shade percentage is important, but the fabric and installation method also affect performance.

American Nettings & Fabric’s knitted shade cloth is available in stable-knit and ribbon-knit styles. The product is UV stabilized, can be cut without unraveling, and is available in multiple sizes and shade levels.

Stable-knit shade cloth is available in 35%, 50%, and 65% shade levels. Ribbon-knit shade cloth is available in 70% and 80% options. These choices make it easier to select a fabric for a home garden, greenhouse, nursery, commercial growing area, or outdoor shade structure.

For permanent or commercial installations, reinforced edges and grommets can make the cloth easier to secure. Secure the fabric firmly, but allow enough ventilation to prevent heat from becoming trapped underneath. A small air gap between the shade cloth and plant canopy can also improve airflow.

Use Shade Fabric Clips for convenient attachment. For custom sizes or larger commercial applications, contact American Nettings & Fabric for product guidance.

Final Shade Cloth Recommendation

If you need a simple starting point:

  • Choose 35% for sun-loving vegetables, flowers, and mild climates.
  • Choose 50% for mixed gardens, leafy greens, and hot summer weather.
  • Choose 65%–70% for seedlings, tender plants, nursery areas, and intense sunlight.
  • Choose 80% for plants that naturally prefer deep shade.

When you are between two options, consider how much afternoon sun your plants receive. Start with the lighter option for full-sun crops and move to a higher percentage when heat and sun stress are the main concerns.

Shop American Knit Shade Cloth or browse all shade products.

Insect Netting for Brassicas: Grow Clean Cabbage, Kale, and Broccoli Without Spraying

Cabbage, kale, broccoli, cauliflower, and Brussels sprouts are productive garden crops. They are also common targets for cabbage worms, diamondback moths, flea beetles, aphids, and cabbage root flies.

The good news: you can protect brassicas without relying on chemical sprays. Insect netting for brassicas creates a physical barrier between your plants and many common pests. When installed early and sealed well, it helps you grow cleaner leaves and healthier heads with less daily pest control.

This guide explains how to choose between insect netting and row cover, how to install it, and how to keep your brassica bed protected through the growing season.

Why use insect netting for brassicas?

Insect netting works by stopping adult insects from reaching your plants. If moths and flea beetles cannot land on the leaves, they have fewer opportunities to feed or lay eggs.

A properly installed cover can help protect:

  • Cabbage
  • Kale
  • Broccoli
  • Cauliflower
  • Brussels sprouts
  • Collards
  • Turnips
  • Radishes
  • Other leafy brassicas

The approach is simple:

  • Cover plants before pests arrive
  • Keep the mesh above the foliage
  • Seal every edge and corner
  • Check the crop regularly
  • Replace the cover after watering or weeding

For additional background on physical crop protection, see our guide to large insect netting for protecting crops without chemicals.

Clean cabbage, kale, and broccoli leaves growing beneath fine insect netting

Insect netting vs. floating row cover

The terms are sometimes used together, but insect netting and floating row cover are different materials.

Insect netting

Insect netting is a knitted or woven mesh designed to let air, light, and rain pass through while blocking pests. It is often the better option for warm-weather brassicas because it adds little insulation.

Use insect netting when your main goal is:

  • Blocking cabbage moths
  • Reducing flea beetle damage
  • Protecting plants during warm weather
  • Allowing rainfall and irrigation through
  • Keeping the crop close to normal outdoor temperatures

Floating row cover

Floating row cover is a lightweight spunbonded fabric. It can exclude insects, but it may also hold in more heat than open mesh.

Row cover is useful when you need:

  • Early-season frost protection
  • A warmer growing environment
  • Short-term protection after transplanting
  • A lightweight barrier over small plants

As temperatures rise, many growers switch from fabric row cover to insect netting. The best choice depends on your climate, planting date, target pests, and the level of frost protection you need.

The University of New Hampshire Extension provides additional guidance on using row covers in the garden.

Choose the right mesh for your pest problem

Mesh size matters. A net that blocks larger moths may not stop small flea beetles or cabbage flies.

As a general starting point:

  • Cabbage worms and moths: approximately 1.0–1.5 mm mesh may provide useful exclusion.
  • Flea beetles: choose a finer mesh and seal the edges carefully.
  • Aphids and cabbage flies: a tighter mesh may be needed where these pests are a regular problem.
  • Mixed pest pressure: a fine mesh around 0.6–1.0 mm is often considered for broad protection, depending on the product and local conditions.

These ranges are guidelines, not a guarantee for every pest or growing region. Very fine mesh can reduce airflow slightly, and the material must still be large enough to fit over the crop with room for growth.

If you are unsure which mesh to select, contact American Nettings & Fabric for help matching the netting to your crop, pest pressure, and bed size.

For pest-specific information, review:

Install the cover immediately after planting

Timing is one of the most important parts of successful insect exclusion.

Install the insect netting:

  • Immediately after direct seeding
  • As soon as transplants are planted
  • Before flea beetles begin feeding
  • Before cabbage moths can lay eggs

Do not wait until the leaves show heavy damage. A cover can stop new pests from reaching the crop, but it will not remove insects or caterpillars already under the netting.

Before covering:

  1. Inspect every plant.
  2. Remove visible caterpillars, eggs, and beetles.
  3. Check the undersides of leaves.
  4. Confirm that seedlings are healthy.
  5. Cover the bed the same day.

If pests are already inside, the netting may protect them along with the plants.

Build a simple low tunnel

Insect netting should be supported above the plants rather than laid directly on the leaves. Hoops create a simple low tunnel and give brassicas room to grow.

Suitable supports include:

  • Fiberglass garden hoops
  • Smooth wire hoops
  • PVC hoops
  • Lightweight metal hoops
  • A simple wood or pipe frame

Place the hoops across the bed and space them closely enough to prevent the netting from sagging. Larger plants need taller supports and more slack.

The goal is to create a covered space where:

  • Leaves do not press against the mesh
  • Plants can continue growing
  • Wind cannot pull the netting onto the crop
  • Water can pass through
  • You can lift one side for maintenance

Leave extra material at both sides and at the ends. A cover that is too short is difficult to seal and may leave gaps.

Hands securing the edge of insect netting tightly against the soil around young brassica plants

Seal every edge and corner

A small opening can be enough for flea beetles or moths to enter. Edge sealing is especially important when using insect netting for brassicas.

Secure the netting with:

  • Soil along both sides
  • Landscape staples
  • Sandbags
  • Smooth rocks
  • Bricks
  • Clips attached to the support frame

Pay close attention to the ends of the tunnel. The corners and end flaps are common entry points.

A reliable installation should have:

  • No open gaps at ground level
  • No loose corners
  • No tears in the mesh
  • Secure fasteners along the frame
  • Enough slack for plant growth

Keep the mesh taut enough to prevent excessive flapping, but do not stretch it so tightly that it tears or pulls away from the soil.

Watering, weeding, and checking the crop

Most insect netting allows rain and irrigation to pass through. You can usually water the plants without removing the cover.

For larger maintenance jobs:

  1. Lift one side of the netting.
  2. Work quickly.
  3. Inspect the plants.
  4. Lower the netting again.
  5. Reseal the edge before leaving the bed.

Avoid leaving the bed open for long periods. One uncovered afternoon during high pest activity can undo careful preparation.

Check the cover at least once a week for:

  • Holes
  • Loose staples
  • Lifted corners
  • Plant growth pressing against the mesh
  • Wind damage
  • Insects trapped inside

A quick inspection also gives you a chance to check soil moisture and plant health.

How long should the netting stay on?

For cabbage, kale, broccoli, and other brassicas grown for leaves or heads, insect netting can often remain in place through much of the growing season.

Keep it on during the period when:

  • Plants are young and vulnerable
  • Flea beetles are active
  • Cabbage moths are laying eggs
  • Leaves are expanding
  • Heads are forming

Brassicas grown for leaves or heads do not need insect pollination for the harvestable crop. This means they can remain covered without the pollination concerns associated with flowering fruit crops.

If you grow brassicas for seed, however, the cover will need to be managed differently. Flowering plants require access for pollination unless you are handling that process yourself.

Remove or lift the netting when:

  • Plants have outgrown the tunnel
  • The crop needs major work
  • Temperatures and airflow become a concern
  • You are preparing plants for seed production
  • Harvest access requires a larger opening

Prevent heat and moisture problems

Fine insect netting usually adds less heat than fabric row cover, but every covered bed still needs monitoring.

During warm weather:

  • Use netting that allows good airflow
  • Avoid pressing the material against the foliage
  • Check plants during hot afternoons
  • Water as needed
  • Open the cover briefly if conditions become excessively hot or humid

A well-supported cover helps air move around the crop. It also reduces the chance that wet leaves will remain trapped against the material.

Garden supplies arranged with insect netting, hoops, clips, landscape staples, and fresh brassica leaves

Use the same system for home gardens and commercial beds

The basic method works for a small raised bed, a backyard row, or a larger commercial planting:

  • Select the appropriate mesh
  • Measure the bed and plant height
  • Install a stable support system
  • Cover early
  • Seal the perimeter
  • Inspect and maintain the barrier

For a small garden, a few hoops and landscape staples may be enough. For larger fields or repeated plantings, continuous rolls of netting can reduce seams and make installation more efficient.

American Nettings & Fabric offers practical netting solutions for home gardeners, growers, landscapers, and agricultural operations. With a broad range of sizes and long experience in specialty fabrics, the team can help you compare options for your brassica beds.

Grow cleaner brassicas with a simple barrier

Insect netting for brassicas is a practical way to reduce cabbage worm and flea beetle damage without routine spraying. The system does not need to be complicated. Start with clean plants, install the cover early, choose mesh for your most difficult pest, and seal every edge.

Protect your next cabbage, kale, and broccoli planting with a reliable physical barrier. Explore insect netting solutions or contact American Nettings & Fabric for help choosing a suitable setup.

Apple Tree Netting: A Simple Way to Protect Your Apples From Birds and Pests

Growing apples takes time, care, and patience. When fruit begins to ripen, birds, squirrels, and other pests can quickly damage the crop you have worked to produce. Apple tree netting provides a practical physical barrier that helps keep your apples protected until harvest.

Whether you care for one backyard tree or several orchard rows, the right netting can make protection easier and more reliable. The key is choosing suitable mesh, supporting it correctly, and sealing the edges so pests cannot enter underneath.

Why Use Apple Tree Netting?

Apple tree netting helps separate ripening fruit from common wildlife pests, including:

  • Birds that peck or remove apples
  • Squirrels that chew fruit and branches
  • Rats and other small mammals
  • Some larger pests that reach fruit from nearby trees or structures

Bird damage is often easy to spot during the day. Squirrels may leave bite marks, torn fruit, or damaged branches. Rats and other nighttime pests may leave partially eaten fruit or droppings beneath the tree.

Netting works best when it fully covers the fruiting area. A loose piece draped over a few branches may leave gaps that pests can use. A properly supported enclosure creates a more complete barrier and keeps the netting away from the fruit.

For larger growing operations, explore American Nettings & Fabric’s orchard solutions and crop protection netting.

Choose the Right Netting for Apple Trees

The best apple tree netting depends on the pests you need to manage and the size of the tree.

For birds and larger wildlife

Use sturdy, knitted netting designed for crop or bird protection. The mesh should be strong enough to remain stable when stretched over a frame. Small mesh can help prevent birds and larger animals from reaching the fruit.

Avoid thin, easily distorted netting that can sag or form deep folds. Wildlife-safe installation is just as important as the netting itself. The net should remain taut and visible, with no loose pockets where an animal could become trapped.

You can review available bird protection netting for applications ranging from garden trees to commercial growing areas.

For squirrels

Squirrels can be more difficult to exclude than birds. They climb, jump, and may chew through lightweight plastic netting. Netting alone may not be enough when squirrel pressure is high.

Consider combining apple tree netting with:

  • A smooth trunk collar or baffle
  • Stronger wire mesh around the lower trunk
  • A framed enclosure with a securely closed bottom
  • Individual fruit protection bags for high-value apples
  • Pruning that removes easy launching points from nearby trees or fences

A full enclosure can still help, but it must be closed carefully at the ground and around the trunk. If a squirrel can enter from below, it may reach the fruit even when the canopy is covered.

For insects and small pests

Fine insect netting can help exclude some flying insects when it is installed over a frame and sealed at the base. The material should sit away from the foliage rather than pressing directly against leaves and fruit.

Insect netting is most effective when:

  • The entire canopy is covered
  • The lower edge reaches the ground
  • The opening around the trunk is closed
  • The net is installed before the target pest becomes active
  • The fabric is checked regularly for holes

For more information about insect protection options, visit the bug protection netting category.

Ripe fruit protected behind green knitted netting

When Should You Install Apple Tree Netting?

Do not cover apple trees during flowering if pollinating insects still need access to the blossoms. Wait until flowering is complete and the petals have fallen.

For bird protection, many growers install netting as the apples begin to develop color, often before the expected harvest period. The exact timing depends on the apple variety, local wildlife activity, and how quickly the fruit ripens.

Install netting early enough to prevent pests from becoming accustomed to feeding on the tree. If birds or squirrels are already visiting regularly, they may continue searching for openings after the net is installed.

Before covering the tree:

  1. Remove damaged or fallen fruit.
  2. Check for birds, nests, or other animals in the canopy.
  3. Prune branches that make the net difficult to support.
  4. Repair nearby fencing or structures that could provide pest access.
  5. Measure the tree and prepare the frame.

How to Install Apple Tree Netting

A frame makes installation easier and helps keep netting safe and effective. It also prevents the fabric from resting directly on the branches, which can make holes and entry points more likely.

1. Measure the tree

Measure the height, width, and length of the area you need to cover. Include enough extra material to extend beyond the lower branches and reach the ground.

The net should not be stretched so tightly that it places pressure on the tree. At the same time, avoid excessive slack that could create folds or pockets.

2. Build a simple support frame

For a small backyard tree, use sturdy stakes, PVC pipe, conduit, or timber to create a cage around the canopy. The frame should extend beyond the outer branches and fruit.

A frame can be shaped as:

  • A simple box
  • A peaked structure
  • A teepee-style support
  • A row cover over several smaller trees

The goal is to keep the net away from the apples and provide secure points for anchoring.

3. Drape the netting over the frame

Lift the netting over the support structure rather than pulling it directly across the branches. For larger trees, two people can make this step faster and reduce snagging.

Smooth the fabric over the top and sides. Keep the net taut enough to prevent deep folds, but avoid bending or compressing the branches.

4. Secure the sides and bottom

Anchor the lower edge with landscape pins, tent pegs, bricks, or other suitable weights. Close the net around the trunk with clips, ties, or a drawstring.

Inspect the entire perimeter. Small gaps at the base, corners, or access points can allow squirrels and other pests to enter.

If you need regular access to the tree, create an overlapping flap on one side. Close the flap securely after every visit.

5. Check the netting regularly

Inspect apple tree netting often during the growing and harvest season. Look for:

  • Holes or chewed areas
  • Loose edges
  • Sagging sections
  • Branches pressing against the fabric
  • Wildlife caught in or near the netting
  • Openings around the trunk

Repair damage promptly. A small hole can become a larger entry point, especially when squirrels are active.

Framed apple tree enclosure with taut netting anchored around the ground

How to Improve Squirrel Protection

Netting can reduce access to apples, but a determined squirrel may test every part of the installation. Combining several exclusion methods usually provides better results than relying on one barrier.

Start with the trunk and nearby access points. Trim branches that connect to neighboring trees, fences, roofs, or other structures. A trunk collar may help on taller trees where squirrels cannot simply jump into the canopy.

For dwarf or semi-dwarf apple trees, a complete cage may be more practical. Stronger mesh around the sides and top can provide additional protection, while a close-fitting base helps prevent entry from underneath.

Individual fruit bags may also work for a small number of high-value apples. They require more labor but allow you to protect specific fruit clusters without enclosing the entire tree.

Cornell Cooperative Extension notes that squirrel exclusion can be challenging and that lightweight bird netting may not stop squirrels on its own. Plan the barrier around the behavior of the pest you are trying to exclude.

Use Netting Safely

Safe installation protects both the crop and local wildlife.

Keep the netting taut and supported. Avoid thin, loose material that can collapse around an animal. Use visible, durable netting where possible, and inspect it regularly.

If an animal becomes trapped, do not handle it unless you are trained and equipped to do so. Contact a local wildlife rescue organization or animal control service for guidance. Requirements vary by location, so follow local wildlife safety recommendations.

The Queensland Government’s fruit tree netting guidance also emphasizes taut installation, sturdy mesh, secure ground anchoring, and regular checks.

Protect More of Your Apple Crop

Apple tree netting is a straightforward way to reduce damage from birds and other pests. For the best results, match the mesh to the problem, support it with a stable frame, seal the bottom, and inspect the installation throughout the season.

Backyard growers can protect a single tree with a simple framed enclosure. Commercial growers may need larger orchard netting systems designed around rows, access lanes, equipment, and harvest schedules.

American Nettings & Fabric has supplied netting and fabric solutions for agricultural and home applications for more than 40 years. Browse bird protection products, review orchard netting options, or visit American Nettings & Fabric for help selecting a suitable solution.

Apple trees protected with professional netting across an orderly orchard

Raspberry Netting: How to Keep Birds Out of Your Berry Patch

Raspberries can take weeks to ripen, but birds may find them in a single morning. Once the berries begin to turn red, robins, finches, starlings, and other birds may move into the patch and damage fruit before you can harvest it.

The most dependable way to protect raspberries is to create a physical barrier with properly installed raspberry netting. With a suitable frame, secure edges, and a planned access point, bird netting can protect a few backyard canes or a longer row of fruit.

This guide explains how to net raspberries for practical, reusable protection.

Why Use Raspberry Netting?

Bird netting helps separate your berry crop from hungry birds without applying sprays or using noisy deterrents. It can be installed during the ripening period, removed after harvest, and stored for future use.

Raspberry netting can help you:

  • Protect ripe and ripening berries
  • Reduce crop loss from birds
  • Keep netting above the fruit and foliage
  • Maintain access for watering and harvesting
  • Cover individual bushes, raised beds, or full rows
  • Reuse the same material across multiple growing seasons

Reflective objects and sound devices may discourage birds for a short time. Birds can become accustomed to these methods, especially when ripe fruit remains available. A complete netting enclosure provides a more consistent barrier when every edge and opening is secured.

For additional crop protection ideas, see our guide to bird netting for crops.

Choose the Right Bird Netting for Raspberries

Start by measuring the entire area you plan to cover. Include the length and width of the raspberry row, the height of the canes, and enough extra material to reach the ground.

Avoid choosing a piece that only covers the top. Birds can enter through open sides or feed from the ends of the row.

American Nettings & Fabric offers Knitted Bird Netting for berry plants, fruit trees, gardens, vineyards, and commercial growing areas. The listed product features include:

  • Green knitted HDPE
  • 3/4-inch square mesh
  • UV stabilization
  • Lightweight, flexible construction
  • Material that cuts without unravelling
  • Sizes for small gardens and larger growing areas

A 3/4-inch mesh may suit many common fruit and garden applications. If smaller birds are causing problems, or if your growing area has unusual bird pressure, review the mesh opening carefully and contact a netting specialist for help selecting a suitable option.

Choose netting that is strong enough for outdoor use but easy to handle. Knitted netting works well for raspberry rows because it can drape over a frame without adding unnecessary weight to the canes.

When Should You Install Raspberry Netting?

Install the netting after flowering and pollination, when the fruit begins to develop and before most berries start to color.

This timing allows pollinators to reach open flowers while creating protection before birds begin regular feeding. If birds have already discovered the patch, install the netting as soon as practical.

Use the condition of the berries rather than a fixed calendar date. Ripening time can vary by:

  • Raspberry variety
  • Local climate
  • Sun exposure
  • Rainfall
  • Growing conditions

Remove the netting after the harvest period ends unless the same structure is being used for another crop.

Build a Frame Over the Raspberry Canes

Netting performs best when it stays above the plants instead of resting directly on the fruit and foliage. A frame also makes it easier to harvest, inspect the canes, and maintain the enclosure.

For a home raspberry patch, you can use:

  • PVC hoops
  • Wood stakes
  • Metal garden posts
  • T-posts
  • Garden poles
  • Wire or cord supports

Place supports along both sides of the row. For longer rows, add supports every few feet so the netting does not sag heavily between posts.

The frame should be tall and wide enough to keep the mesh away from the fruiting canes. Leave room to reach into the enclosure and move along the row if regular harvesting is needed.

Cover sharp post ends with a suitable cap or soft protective material. Sharp edges can catch and damage the mesh.

Raspberry row with green knitted netting raised over hoops and anchored at the soil

How to Net Raspberries: Step-by-Step

1. Measure the raspberry patch

Measure the full length and width of the row or planting area. Then measure the height of the frame.

Add extra material for:

  • The sides of the enclosure
  • Ground anchoring
  • Overlapping seams
  • Corners and uneven ground
  • A harvesting flap or access door

It is better to have extra netting available than to cut the material too close. Additional coverage makes it easier to close gaps.

2. Install the supports

Set posts or stakes on both sides of the raspberry row. Add hoops, a top rail, or support lines across the structure.

Check that the frame is stable before adding the netting. Wind can place additional pressure on the supports, especially when the netting is wet.

3. Position the netting

Unroll and untangle the netting before placing it over the frame. On a longer row, two people can make positioning easier.

Center the netting over the structure. Pull it into place carefully so it does not catch on branches or snag on rough supports.

The mesh should remain moderately taut. Avoid large, loose sections that can sag onto the berries or create a wildlife hazard.

4. Secure the sides and bottom edge

The bottom edge is one of the most important parts of the installation. Birds may enter through a small opening at the base even when the top and sides appear covered.

Use Fabric Staples & Pins, boards, suitable garden weights, or soil to secure the edge. Close gaps around:

  • The ends of the row
  • Frame corners
  • Uneven ground
  • Posts and stakes
  • Seams between panels

Walk around the full perimeter after installation. Look from ground level for openings that may not be visible from above.

5. Create an access opening

Plan the access point before fastening every edge. You will need to enter the enclosure for picking, watering, pruning, and inspection.

Common options include:

  • A clipped side flap
  • An overlapping end panel
  • A curtain-style opening
  • A removable section of netting

Use Netting Clips to connect netting to netting or netting to wire. Clips make it easier to open, adjust, and remove sections without cutting the material.

Keep the access point closed whenever you are not working inside the enclosure.

Hands fastening green raspberry netting to a garden frame with reusable clips

Avoid These Common Raspberry Netting Problems

Netting resting on the fruit

When the mesh sits directly on the raspberries, birds may still reach fruit through the openings. The net can also rub against berries and branches in windy conditions.

Use hoops or posts to raise the netting above the canes whenever possible.

Loose edges

An unsecured bottom edge gives birds easy access. Secure the entire perimeter, including the ends and corners.

Large openings at seams

If you need more than one piece of netting, overlap the panels and fasten the seam with clips or suitable ties. Inspect the join from both sides.

No planned access point

Removing the entire enclosure each time you harvest is inconvenient. A defined flap or curtain opening makes it easier to keep the netting in place throughout the season.

Installing after birds begin feeding

Birds may continue returning to a patch they have already found. Install raspberry netting before the berries fully ripen and before feeding becomes heavy.

Inspect the Netting During the Season

Check the enclosure regularly, particularly after strong wind or heavy rain. Look for:

  • Tears or holes
  • Loose clips and ties
  • Displaced staples
  • Sagging sections
  • Openings along the ground
  • Branches pressing against the mesh
  • Wildlife that may have entered

Repair small damage promptly. A small opening can become larger as the wind moves the netting.

Keep the mesh supported and reasonably taut. If an animal becomes caught, follow local wildlife guidance or contact a qualified wildlife professional.

Remove and Store the Netting After Harvest

Once raspberry harvest is complete, remove the netting carefully. Clear away leaves, stems, and other debris. Allow the material to dry before storage.

Roll or fold the netting neatly and keep it in a dry location away from direct sunlight, rodents, and sharp tools. Inspect it before storing so repairs can be completed before the next season.

Proper handling can make installation easier and extend the useful life of reusable netting.

Green knitted netting rolled for dry storage beside a raspberry garden

Protect Your Raspberry Harvest

The best way to keep birds out of a raspberry patch is to install a complete, supported barrier before the fruit is fully ripe. Choose enough netting to cover the top and sides, keep the mesh above the canes, and secure every edge.

For a few bushes, a simple hoop frame may be enough. Longer rows may benefit from posts, support lines, clips, and a defined access flap.

Shop Knitted Bird Netting for raspberry protection.

For help choosing a practical size or setup, contact American Nettings & Fabric.

April Newsletter

April - Newsletter Header


Shop Now!

Knitted Fabric Deco Pots

Deco pot-5

Click Here to Buy!

Crop Covers

crop cover application

Click Here to Buy!

other promos header


recipes header

Crock Pot Chicken Pot Pie


Click here for Recipe !

Lemon Blueberry Sweet Rolls


Click here for Recipe !

Shopping Cart
Scroll to Top