Raspberries can take weeks to ripen, but birds may find them in a single morning. Once the berries begin to turn red, robins, finches, starlings, and other birds may move into the patch and damage fruit before you can harvest it.
The most dependable way to protect raspberries is to create a physical barrier with properly installed raspberry netting. With a suitable frame, secure edges, and a planned access point, bird netting can protect a few backyard canes or a longer row of fruit.
This guide explains how to net raspberries for practical, reusable protection.
Why Use Raspberry Netting?
Bird netting helps separate your berry crop from hungry birds without applying sprays or using noisy deterrents. It can be installed during the ripening period, removed after harvest, and stored for future use.
Raspberry netting can help you:
- Protect ripe and ripening berries
- Reduce crop loss from birds
- Keep netting above the fruit and foliage
- Maintain access for watering and harvesting
- Cover individual bushes, raised beds, or full rows
- Reuse the same material across multiple growing seasons
Reflective objects and sound devices may discourage birds for a short time. Birds can become accustomed to these methods, especially when ripe fruit remains available. A complete netting enclosure provides a more consistent barrier when every edge and opening is secured.
For additional crop protection ideas, see our guide to bird netting for crops.
Choose the Right Bird Netting for Raspberries
Start by measuring the entire area you plan to cover. Include the length and width of the raspberry row, the height of the canes, and enough extra material to reach the ground.
Avoid choosing a piece that only covers the top. Birds can enter through open sides or feed from the ends of the row.
American Nettings & Fabric offers Knitted Bird Netting for berry plants, fruit trees, gardens, vineyards, and commercial growing areas. The listed product features include:
- Green knitted HDPE
- 3/4-inch square mesh
- UV stabilization
- Lightweight, flexible construction
- Material that cuts without unravelling
- Sizes for small gardens and larger growing areas
A 3/4-inch mesh may suit many common fruit and garden applications. If smaller birds are causing problems, or if your growing area has unusual bird pressure, review the mesh opening carefully and contact a netting specialist for help selecting a suitable option.
Choose netting that is strong enough for outdoor use but easy to handle. Knitted netting works well for raspberry rows because it can drape over a frame without adding unnecessary weight to the canes.
When Should You Install Raspberry Netting?
Install the netting after flowering and pollination, when the fruit begins to develop and before most berries start to color.
This timing allows pollinators to reach open flowers while creating protection before birds begin regular feeding. If birds have already discovered the patch, install the netting as soon as practical.
Use the condition of the berries rather than a fixed calendar date. Ripening time can vary by:
- Raspberry variety
- Local climate
- Sun exposure
- Rainfall
- Growing conditions
Remove the netting after the harvest period ends unless the same structure is being used for another crop.
Build a Frame Over the Raspberry Canes
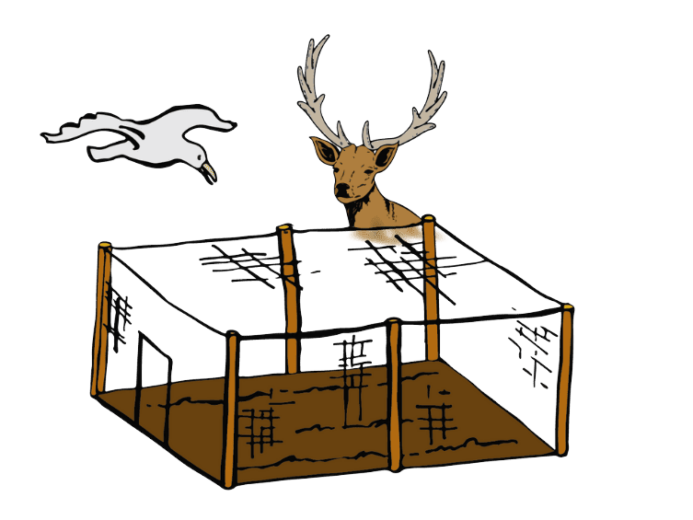
Netting performs best when it stays above the plants instead of resting directly on the fruit and foliage. A frame also makes it easier to harvest, inspect the canes, and maintain the enclosure.
For a home raspberry patch, you can use:
- PVC hoops
- Wood stakes
- Metal garden posts
- T-posts
- Garden poles
- Wire or cord supports
Place supports along both sides of the row. For longer rows, add supports every few feet so the netting does not sag heavily between posts.
The frame should be tall and wide enough to keep the mesh away from the fruiting canes. Leave room to reach into the enclosure and move along the row if regular harvesting is needed.
Cover sharp post ends with a suitable cap or soft protective material. Sharp edges can catch and damage the mesh.

How to Net Raspberries: Step-by-Step
1. Measure the raspberry patch
Measure the full length and width of the row or planting area. Then measure the height of the frame.
Add extra material for:
- The sides of the enclosure
- Ground anchoring
- Overlapping seams
- Corners and uneven ground
- A harvesting flap or access door
It is better to have extra netting available than to cut the material too close. Additional coverage makes it easier to close gaps.
2. Install the supports
Set posts or stakes on both sides of the raspberry row. Add hoops, a top rail, or support lines across the structure.
Check that the frame is stable before adding the netting. Wind can place additional pressure on the supports, especially when the netting is wet.
3. Position the netting
Unroll and untangle the netting before placing it over the frame. On a longer row, two people can make positioning easier.
Center the netting over the structure. Pull it into place carefully so it does not catch on branches or snag on rough supports.
The mesh should remain moderately taut. Avoid large, loose sections that can sag onto the berries or create a wildlife hazard.
4. Secure the sides and bottom edge
The bottom edge is one of the most important parts of the installation. Birds may enter through a small opening at the base even when the top and sides appear covered.
Use Fabric Staples & Pins, boards, suitable garden weights, or soil to secure the edge. Close gaps around:
- The ends of the row
- Frame corners
- Uneven ground
- Posts and stakes
- Seams between panels
Walk around the full perimeter after installation. Look from ground level for openings that may not be visible from above.
5. Create an access opening
Plan the access point before fastening every edge. You will need to enter the enclosure for picking, watering, pruning, and inspection.
Common options include:
- A clipped side flap
- An overlapping end panel
- A curtain-style opening
- A removable section of netting
Use Netting Clips to connect netting to netting or netting to wire. Clips make it easier to open, adjust, and remove sections without cutting the material.
Keep the access point closed whenever you are not working inside the enclosure.

Avoid These Common Raspberry Netting Problems
Netting resting on the fruit
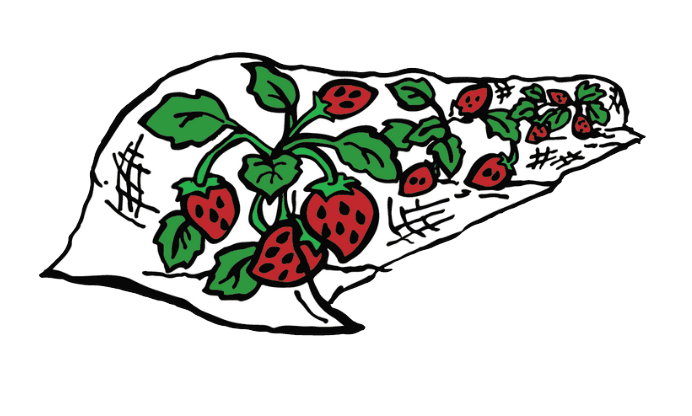
When the mesh sits directly on the raspberries, birds may still reach fruit through the openings. The net can also rub against berries and branches in windy conditions.
Use hoops or posts to raise the netting above the canes whenever possible.
Loose edges
An unsecured bottom edge gives birds easy access. Secure the entire perimeter, including the ends and corners.
Large openings at seams
If you need more than one piece of netting, overlap the panels and fasten the seam with clips or suitable ties. Inspect the join from both sides.
No planned access point
Removing the entire enclosure each time you harvest is inconvenient. A defined flap or curtain opening makes it easier to keep the netting in place throughout the season.
Installing after birds begin feeding
Birds may continue returning to a patch they have already found. Install raspberry netting before the berries fully ripen and before feeding becomes heavy.
Inspect the Netting During the Season
Check the enclosure regularly, particularly after strong wind or heavy rain. Look for:
- Tears or holes
- Loose clips and ties
- Displaced staples
- Sagging sections
- Openings along the ground
- Branches pressing against the mesh
- Wildlife that may have entered
Repair small damage promptly. A small opening can become larger as the wind moves the netting.
Keep the mesh supported and reasonably taut. If an animal becomes caught, follow local wildlife guidance or contact a qualified wildlife professional.
Remove and Store the Netting After Harvest
Once raspberry harvest is complete, remove the netting carefully. Clear away leaves, stems, and other debris. Allow the material to dry before storage.
Roll or fold the netting neatly and keep it in a dry location away from direct sunlight, rodents, and sharp tools. Inspect it before storing so repairs can be completed before the next season.
Proper handling can make installation easier and extend the useful life of reusable netting.

Protect Your Raspberry Harvest
The best way to keep birds out of a raspberry patch is to install a complete, supported barrier before the fruit is fully ripe. Choose enough netting to cover the top and sides, keep the mesh above the canes, and secure every edge.
For a few bushes, a simple hoop frame may be enough. Longer rows may benefit from posts, support lines, clips, and a defined access flap.
Shop Knitted Bird Netting for raspberry protection.
For help choosing a practical size or setup, contact American Nettings & Fabric.